# Entra AD SSO SAML

# Sadevio Configuration

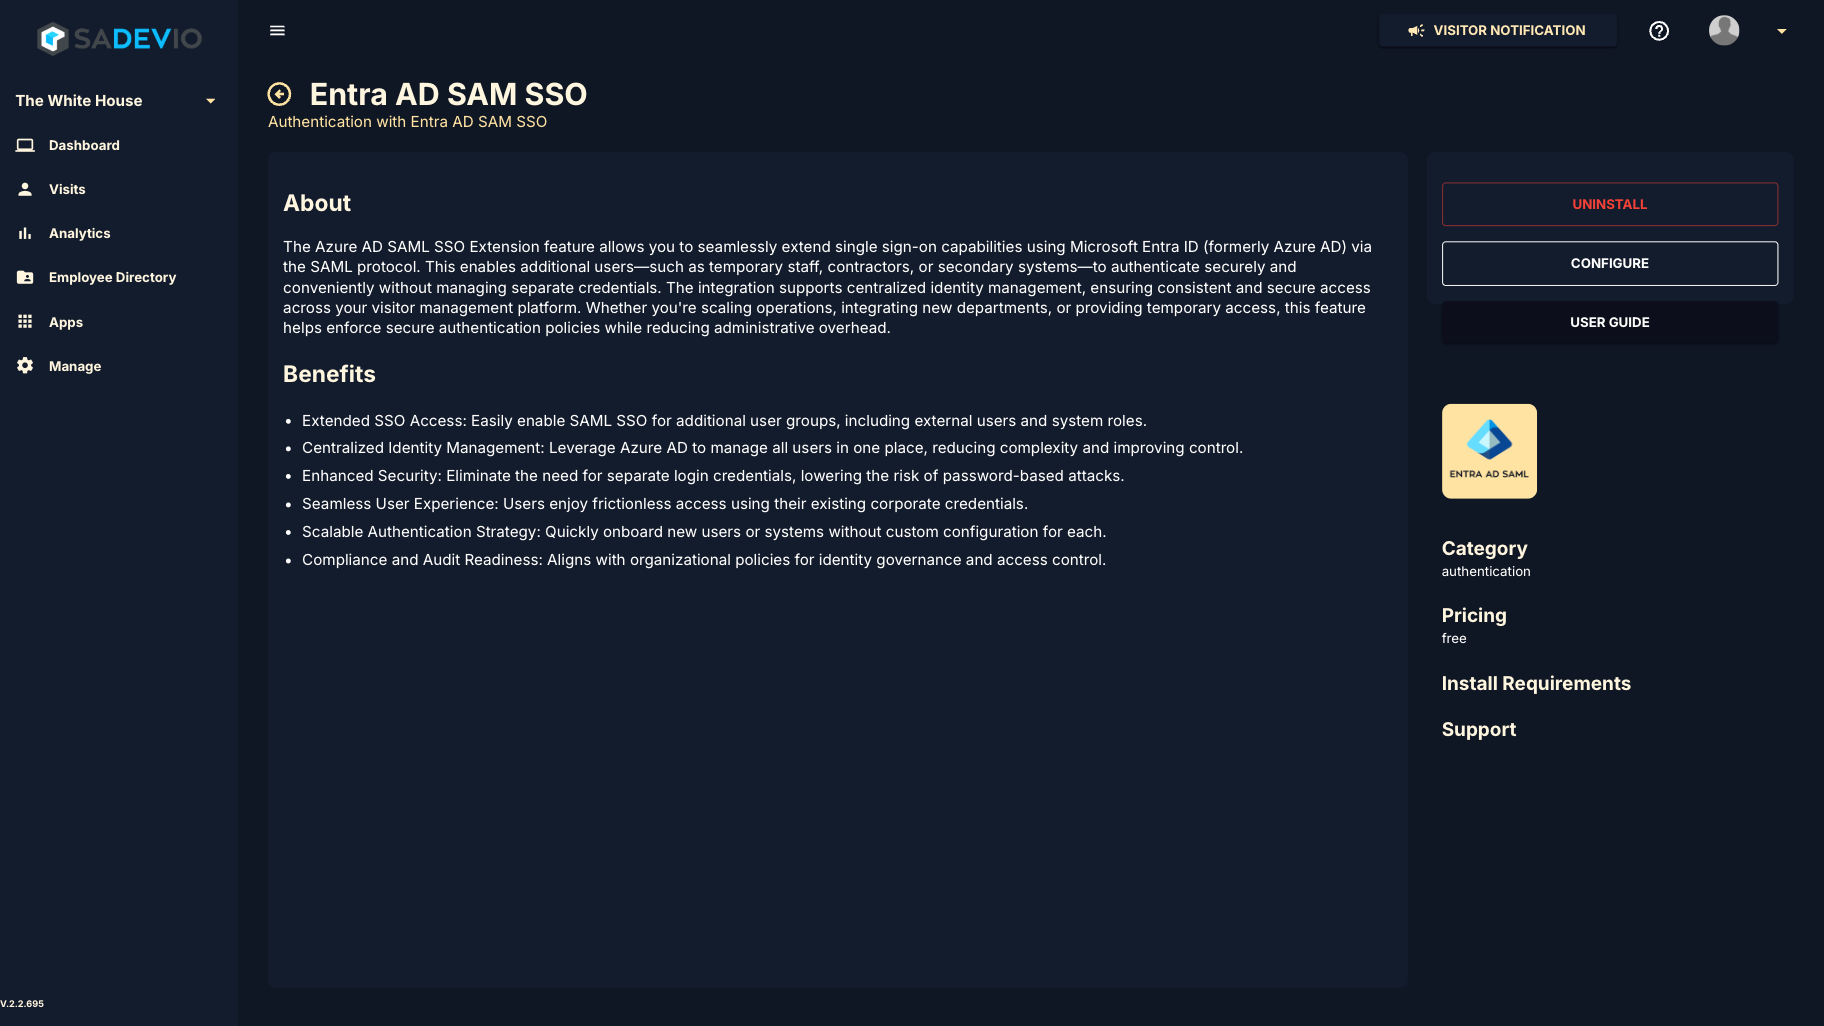
To activate the sadevio Entra AD sso saml login to your application and go to Apps and select Entra AD SSO SAML

Install the application.

[![ScreenShot Tool -20250604090748.png](https://help.sadevio.com/uploads/images/gallery/2025-06/scaled-1680-/screenshot-tool-20250604090748.png)](https://help.sadevio.com/uploads/images/gallery/2025-06/screenshot-tool-20250604090748.png)

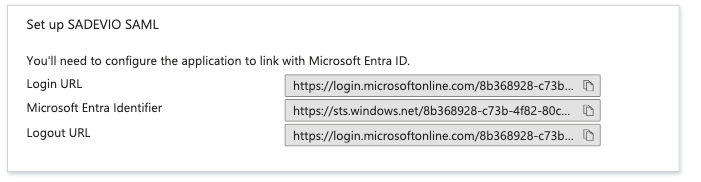
Under step 4 you can find the needed urls on the azure portal.

[![Screenshot 2025-05-30 at 11.23.57 PM.png](https://help.sadevio.com/uploads/images/gallery/2025-05/scaled-1680-/screenshot-2025-05-30-at-11-23-57-pm.png)](https://help.sadevio.com/uploads/images/gallery/2025-05/screenshot-2025-05-30-at-11-23-57-pm.png)

#### Azure Entity ID (entra\_entity\_id)

Copy the "microsoft Entra identifier" e.g. [https://sts.windows.net/8b368928-c73b-4f82-80c3-5718b55b7351/](https://sts.windows.net/8b368928-c73b-4f82-80c3-5718b55b7351/)

#### Azure SSO URL

<div id="bkmrk--2">  
</div><div id="bkmrk-copy-the-%22login-url%22">Copy the "Login URL" e.g.</div><div id="bkmrk--3">  
</div><div id="bkmrk-https%3A%2F%2Flogin.micros">https://login.microsoftonline.com/8b368928-c73b-4f82-80c3-5718b55b7351/saml2</div>#### X.509 Certificate

<div id="bkmrk--4">  
</div><div id="bkmrk-download-the-certifi">Download the Certificate (Base64) and paste the content</div><div id="bkmrk--5">  
</div>e.g. -----BEGIN CERTIFICATE-----  
MIIC8DCCAdigAwIBAgIQL44GWK+1j5pEf9lbkJiRfTANBgkqhkiG9w0BAQsFADA0MTIwMAYDVQQD  
EylNaWNyb3NvZnQgQXp1cmUgRmVkZXJhdGVkIFNTTyBDZXJ0aWZpY2F0ZTAeFw0yNTA1MzAyMzE2  
NThaFw0yODA1MzAyMzE2NThaMDQxMjAwBgNVBAMTKU1pY3Jvc29mdCBBenVyZSBGZWRlcmF0ZWQg  
U1NPIENlcnRpZmljYXRlMIIBIjANBgkqhkiG9w0BAQEFAAOCAQ8AMIIBCgKCAQEAqAS1wuq1oXaO  
sdcuFZj/HCMKs2wdsfx0V0Jw+UOxaE0YuWycze70F2v4MvOOk/KwOOz8czCTvn43VVQlrUTX2ylv  
NqQCWMmEwShrQ1CHRoh5T3R4wXn1aC5XRJFnPepBartmUTAwoyCriTOrhFW4xU8jmQT1i3EP5tkq  
FOmZ97hOOgSD+G4lQUkR+b1gAnN/1HBx9r5q9+R2tZB2+t+i3EI3JVXF6XmcYVPnJR/M2wEPqlil  
FiY/nOxjnnQ4nFF5VzzWGjD1vfSuOXswxqZRLoE+wTK2LqhKfF7xUx9UFdfCQMV0rahE5ZR8lLTf  
6h0q356goOyE6pT1ymwLSfZ17QIDAQABMA0GCSqGSIb3DQEBCwUAA4IBAQBygoMNWNjmUlCa/U/6  
U1l2uZb9IHwudCEIDOc0iXSCQxwlIob9S5R7mIFNx847xQTNWterrwEsddSxwznzeR4lRZpNQHzI  
nReymGubELCHhW6AqMjyQzEr2wst41qPufecfa9n/dPUFSBDbeuqHBhAj0hb3jF5m4g4Ewry9ewz  
pcqO0wQNnN2Wd9pQuSekw2CZH76IWBD1Y/Sdi4Knm/zMpzPosUidKcs3glLSrEOT/sow+EMoz1k1  
7T41JBDCSHd0Q2bNW5zSGv8o6p7rWSQQ32YPY3VajmPdBsp/6vjQWDNpvoCJ1GjeQaUA0Ohitw5D  
4RzXYDT93h1EmzyylAJa  
\-----END CERTIFICATE-----

#### Azure Metadata URL

<div id="bkmrk--6"><div>  
</div></div><div id="bkmrk-copy-the-app-federat">Copy the App Federation Metadata Url in section 3e.g. [https://login.microsoftonline.com/8b368928-c73b-4f82-80c3-5718b55b7351/federationmetadata/2007-06/federationmetadata.xml?appid=bfb35151-15fd-4e1d-a357-6cb695f2c282](https://login.microsoftonline.com/8b368928-c73b-4f82-80c3-5718b55b7351/federationmetadata/2007-06/federationmetadata.xml?appid=bfb35151-15fd-4e1d-a357-6cb695f2c282)</div><div id="bkmrk--7"></div>#### Example Configuration

<div id="bkmrk--8"></div>[![Screenshot 2025-06-04 at 9.07.39 AM.png](https://help.sadevio.com/uploads/images/gallery/2025-06/scaled-1680-/screenshot-2025-06-04-at-9-07-39-am.png)](https://help.sadevio.com/uploads/images/gallery/2025-06/screenshot-2025-06-04-at-9-07-39-am.png)

#### User authentication activation

To activate the authentication type Entra SAML SSO, you need to configure the user to the entra saml soo authentication type under Employees.

# Azure Entra ID (Azure AD) – SAML SSO Configuration Guide

### Step 1: Create an Enterprise Application

1. Go to [https://entra.microsoft.com](https://entra.microsoft.com/)
2. In the left menu, click **"Applications"** → **"Enterprise applications"**
3. Click **"+ New application"**
4. Select **"Create your own application"**
5. Enter a name (e.g. `Sadevio Visitor SSO`)
6. Choose **"Integrate any other application you don't find in the gallery"**
7. Click **Create**

### Step 2: Add entra information to sadevio

[**https://help.sadevio.com/books/entra-ad-sso-saml/page/sadevio-configuration**](https://help.sadevio.com/books/entra-ad-sso-saml/page/sadevio-configuration)

### Step 3: Configure SAML-based Sign-On

1. In the new app, go to **"Single sign-on"**
2. Select **SAML** as the sign-on method
3. Fill out the **Basic SAML Configuration** with the following values:

<div class="_tableContainer_16hzy_1" id="bkmrk-field-value-identifi"><div class="_tableWrapper_16hzy_14 group flex w-fit flex-col-reverse" tabindex="-1"><table class="w-fit min-w-(--thread-content-width)" data-end="1427" data-start="959"><thead data-end="976" data-start="959"><tr data-end="976" data-start="959"><th data-col-size="sm" data-end="967" data-start="959">Field</th><th data-col-size="md" data-end="976" data-start="967">Value</th></tr></thead><tbody data-end="1427" data-start="995"><tr data-end="1097" data-start="995"><td data-col-size="sm" data-end="1024" data-start="995">**Identifier (Entity ID)**</td><td data-col-size="md" data-end="1097" data-start="1024">`https://cloud.sadevio.com/sadevio_module/api/localhost/saml/{tenant_id}`</td></tr><tr data-end="1213" data-start="1098"><td data-col-size="sm" data-end="1124" data-start="1098">**Reply URL (ACS URL)**</td><td data-col-size="md" data-end="1213" data-start="1124">`https://cloud.sadevio.com/sadevio_module/api/localhost/saml/callback?tenant=`{tenant_id}``</td></tr><tr data-end="1263" data-start="1214"><td data-col-size="sm" data-end="1232" data-start="1214">**Sign on URL**</td><td data-col-size="md" data-end="1263" data-start="1232">`https://cloud.sadevio.com`</td></tr><tr data-end="1312" data-start="1264"><td data-col-size="sm" data-end="1293" data-start="1264">**Relay State (Optional)**</td><td data-col-size="md" data-end="1312" data-start="1293">*(Leave empty)*</td></tr><tr data-end="1427" data-start="1313"><td data-col-size="sm" data-end="1341" data-start="1313">**Logout URL (Optional)**</td><td data-col-size="md" data-end="1427" data-start="1341">`https://cloud.sadevio.com/adevio_module/api/localhost/saml/logout?tenant=`{tenant_id}``</td></tr></tbody></table>

</div></div>💡 You can copy and paste these values from the configuration form inside the Sadevio admin panel.

### Step 4: Configure User Attributes &amp; Claims

1. Click **Edit** under **Attributes &amp; Claims**
2. Ensure the following claims are included (default setup should already have them):
    
    
    - `email` → user’s email address
    - `givenname` → user’s first name
    - `surname` → user’s last name
    - `name` or `userprincipalname` → unique identifier (used as NameID)

ℹ️ The `NameID` claim should ideally be set to the user’s **email** address (you can adjust this in "Unique User Identifier").

**Verification certificates.**

On the sadevio platform, you can download the certificate to sign the authentication request. Download the certificate and upload it to entra.microsoft.com

[![Screenshot 2025-06-04 at 9.07.20 AM.png](https://help.sadevio.com/uploads/images/gallery/2025-06/scaled-1680-/screenshot-2025-06-04-at-9-07-20-am.png)](https://help.sadevio.com/uploads/images/gallery/2025-06/screenshot-2025-06-04-at-9-07-20-am.png)

Select "Require verification certificats" and upload the sadevio certificate

### Step 5: Download Certificate and SSO URL

1. Under **SAML Signing Certificate**, download the following:
    
    
    - **Certificate (Base64)** – This is the **X.509 Certificate**
2. Also copy the **Login URL** – This is the **Azure SSO URL**
3. (Optional) Copy the **App Federation Metadata URL** – used if you want dynamic configuration

### Step 6: Download Certificate and SSO URL

1. Under **SAML Signing Certificate**, download the following:
    
    
    - **Certificate (Base64)** – This is the **X.509 Certificate**
2. Also copy the **Login URL** – This is the **Azure SSO URL**
3. (Optional) Copy the **App Federation Metadata URL** – used if you want dynamic configuration

### Step 7: Assign Users

1. In Azure, go to the **Users and groups** section of the Enterprise App
2. Click **+ Add user/group**
3. Select the users or groups who should be able to sign in using SSO
4. Click **Assign**