# Sadevio Self-Service Kiosk
# Replacing the Timer Battery in the Kiosk
### Required Tools
- **Screwdriver**
- **Wrench or socket tool** (for loosening the nuts, size depends on model)
- **4 × AA batteries** (new)
---
### 1.Disconnect power
- **Unplug the kiosk** from the power outlet to ensure it is completely powered off.
---
### 2. Remove the cover
- Use a **wrench or socket tool** to loosen and remove the **4 nuts**.
- Remove the cover carefully.
---
### 3. Loosen the timer (if required)
- If the timer is mounted tightly:
- Slightly loosen the **2 nuts** on the left and right side of the timer using the wrench or socket tool.
- Do **not** remove them completely.
---
### 4. Remove the timer from the DIN rail
- On the **bottom side** of the timer, locate the **red release knob / lever**.
- Use a screwdriver to **push it downward**.
- Pull the timer **forward** to remove it from the DIN rail.
---
### 5. Replace the batteries
- On the **back side** of the timer:
- Replace the **4 AA batteries**.
- Make sure the **polarity (+ / –)** is correct.
---
### 6. Reinstall the timer
- Mount the timer back onto the DIN rail and press it firmly into place.
- Tighten the previously loosened nuts using the wrench or socket tool.
---
### 7. Check connections
- **Before reinstalling the cover**:
- Check all **connectors and terminals**.
- If any connectors are loose, gently tighten them with a screwdriver.
---
### 8. Reinstall the cover
- Put the cover back on and secure it with the **4 nuts**.
---
### 9. Power on and set mode
- Plug the kiosk back into the power outlet.
- Set the timer switch from **AUTO / MANU** to **ON**.
# Refill card stacker
### 1. Remove cards from the recycle bin
- Remove new cards from the **recycle bin** and prepare them for loading.
- Make sure the cards are **aligned and clean**.
---
### 2. Remove the card stacker box
- Locate the **release switch** on the **side of the card stacker box**.
- Pull the release switch.
- **Lift the box upward** to remove it from the stacker.
---
### 3. Load cards into the box
- Inside the box, locate the **metal spring-loaded slider** (card pressure plate).
- **Lift the metal slider upward**.
- Place the cards **under the slider**, making sure they are stacked evenly.
- Slowly release the slider so it rests **on top of the cards**, applying pressure.
> ⚠️ Important: The metal slider must always be on top of the cards to ensure proper feeding.
---
### 4. Reinsert the box into the stacker
- Insert the box back into the card stacker.
- **Check the direction label** on the top of the box and ensure it is oriented correctly.
- Push the box down until it **locks firmly into place**.
---
### 5. Final check
- Gently pull on the box to confirm it is **securely locked**.
- The card stacker is now ready for operation.
# Setting Up the Kiosk
## ⚠️ Important Safety Notice (Before Setup)
- **The transport wheels must be removed before operating the kiosk.**The wheels are for transportation only and must not be used during normal operation.
### Power Connection
- On the **lower back side** of the kiosk, you will find a **small access door**.
- Behind this door are:
- Power plug
- Ethernet input
- Power switch
- Connect the **power cable** to the kiosk.
- Turn the **power switch** to ON.
### Network Connection
We strongly recommend using a **wired Ethernet connection** for best reliability.
#### Ethernet Connection (Recommended)
1. On the **lower back side** of the kiosk, connect the **Ethernet cable** to the Ethernet port.
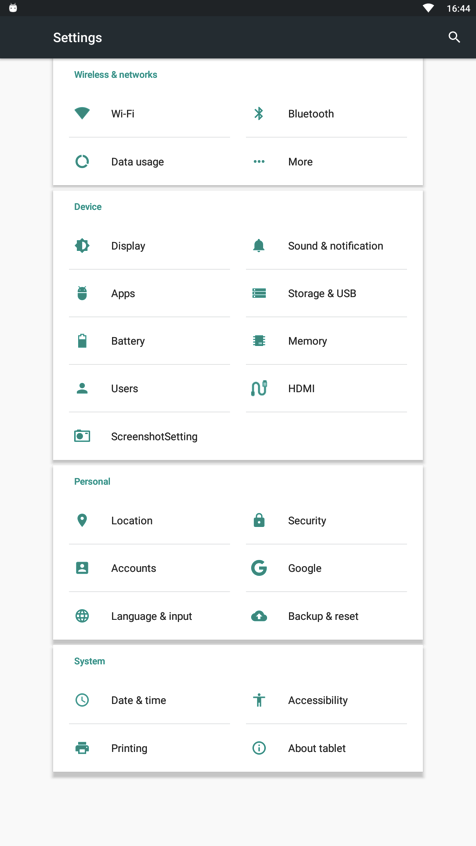
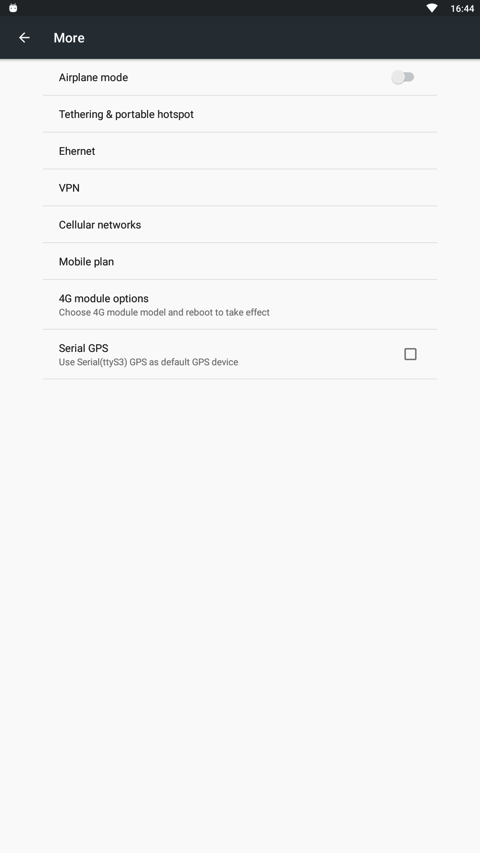
2. Configure the network settings on the kiosk:
- Go to **Settings → More → Ethernet**
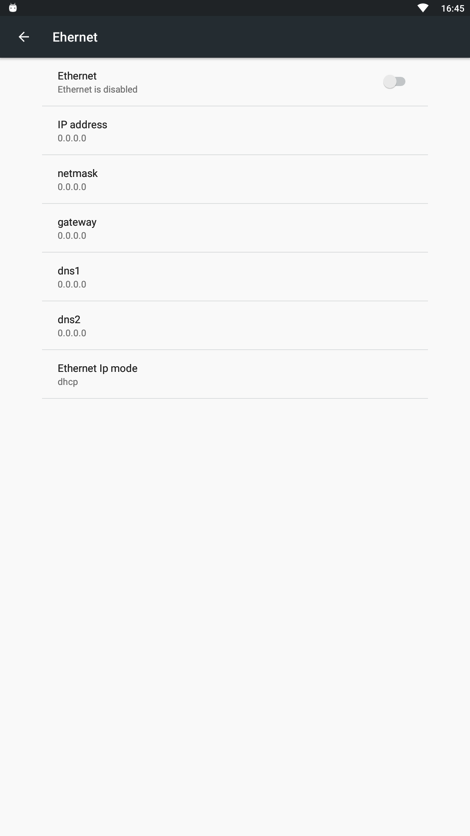
3. Activate the Ethernet connection.
4. Configure your **network-specific settings** (e.g. DHCP or static IP).
📌 **Recommendation:**
If you are using a wired Ethernet connection, we recommend **disabling Wi-Fi**.
[ ](https://help.sadevio.com/uploads/images/gallery/2026-01/pXKimage.png)
[](https://help.sadevio.com/uploads/images/gallery/2026-01/LKGimage.png)
[](https://help.sadevio.com/uploads/images/gallery/2026-01/bXximage.png)
#### Wi-Fi Connection (Optional)
If Ethernet is not available, Wi-Fi can be used.
1. Go to **Settings → Wi-Fi**
2. Enable **Wi-Fi**
3. Select the Wi-Fi network you want to connect to
4. Enter the password if required
5. Verify that the Wi-Fi connection is successfully established