Velocity Integration
Here we will show you how to activate and install the velocity integration
- Install Velocity Web Service
- Sadevio On-Premise configuration
- Sadevio Cloud System Connector
- Velocity Card Format Mapping
- Activate QR-Code generation in velocity
- Temporary Card Replacement
Install Velocity Web Service
Requirements
- Velocity Operator User: This is required for the IIS application pool.
- Velocity REST API Software: Ensure you have the necessary software for the REST API.
- Velocity REST API User Creation Tool: This tool is needed to create users for the REST API.
- Velocity License: A valid Velocity license is required.
- SDK2 or RestfulVelocitySDK (SEN 165034): Ensure you have either SDK2 or RestfulVelocitySDK with the specified version.
Installation
- Download the Velocity REST API Service Pack:
- Obtain the software pack by contacting Identiv IGS or your SADEVIO account manager.
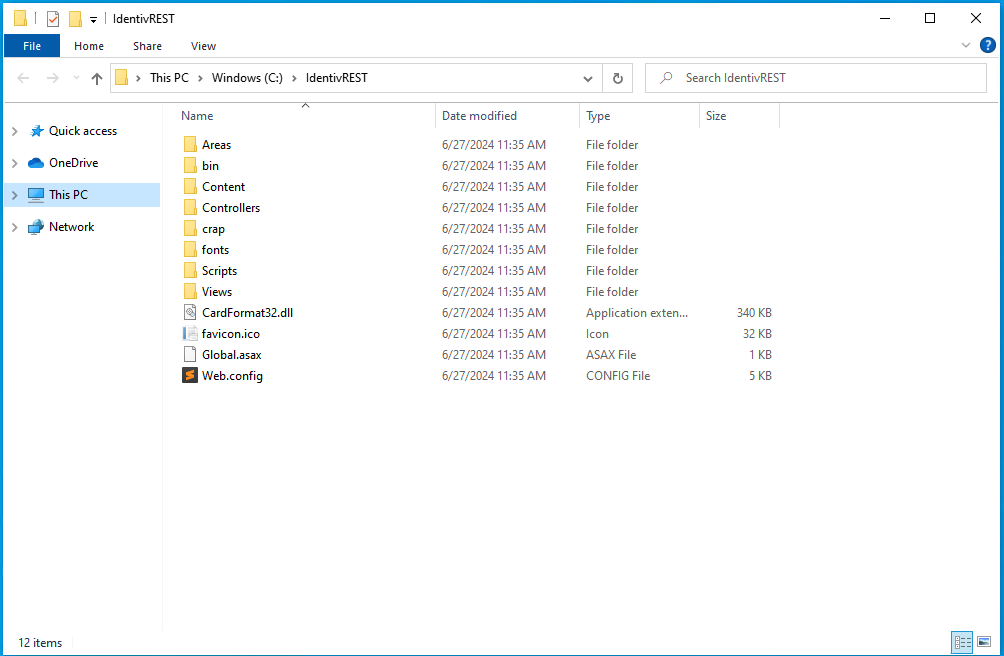
- Unzip the Directory:
- Extract the contents of the service pack to your desired location.
- Open IIS Manager:
- Launch the Internet Information Services (IIS) Manager.
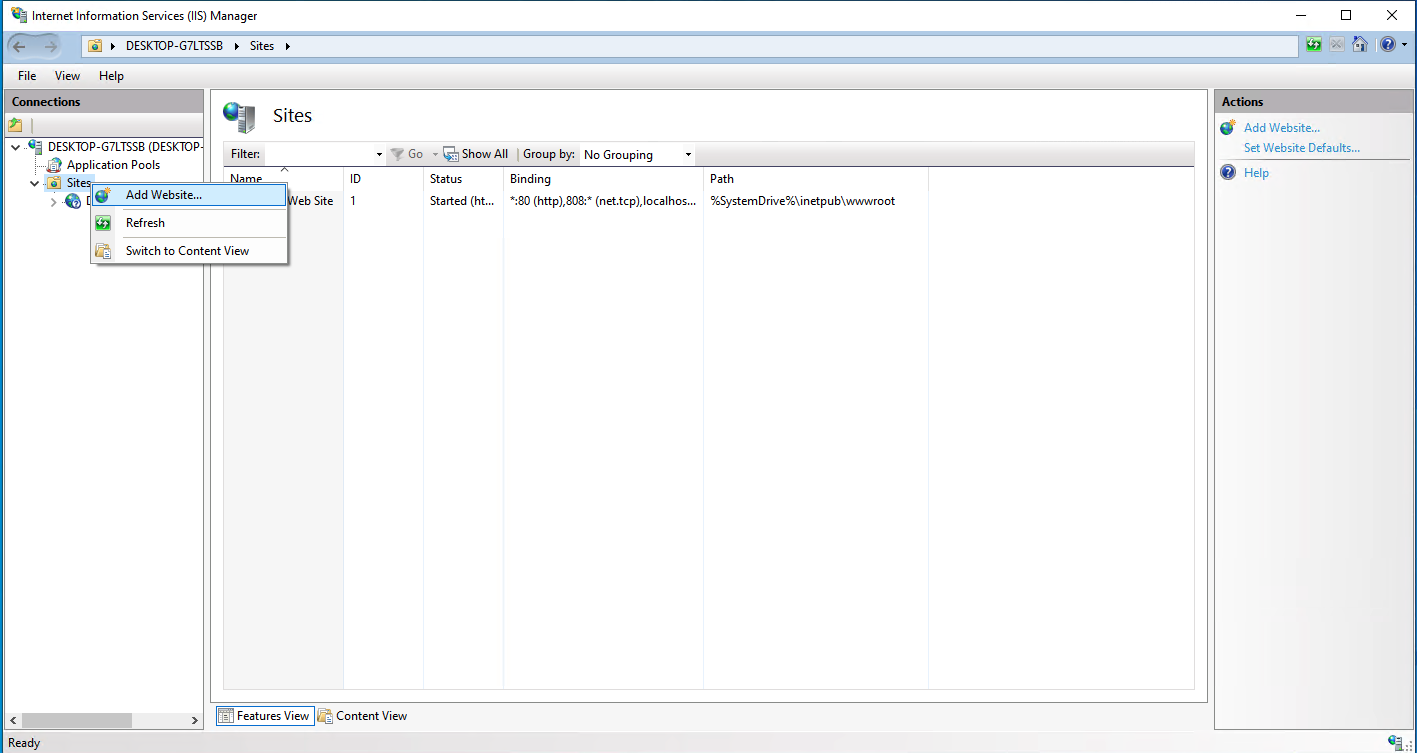
- Add a New Website:
- In the left-hand Connections pane, right-click on "Sites" and select "Add Website..."
- Site Name: Enter a name for your site, e.g.,
velocityrestapi. - Physical Path: Select the directory where you have unpacked the Velocity REST API software.
- TCP Port: Set your dedicated TCP port, e.g.,
8088.

Configure the Application Pool:
-
- Windows Account: Ensure the service uses a Windows account that is a Velocity operator with administrative permissions to add/update persons in Velocity.
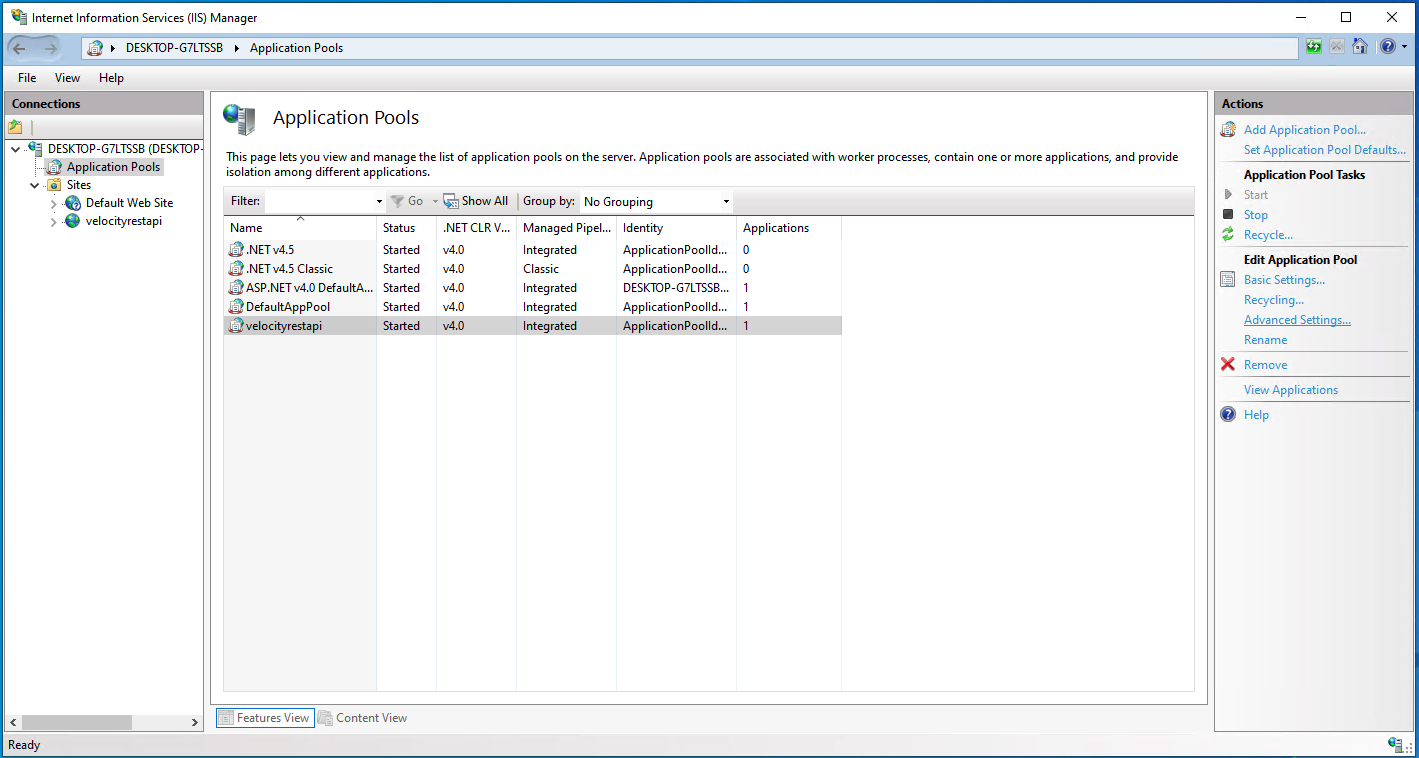
- Select the Application Pool:
- In the left-hand Connections pane, click on "Application Pools."
- Select your REST API application pool from the list.
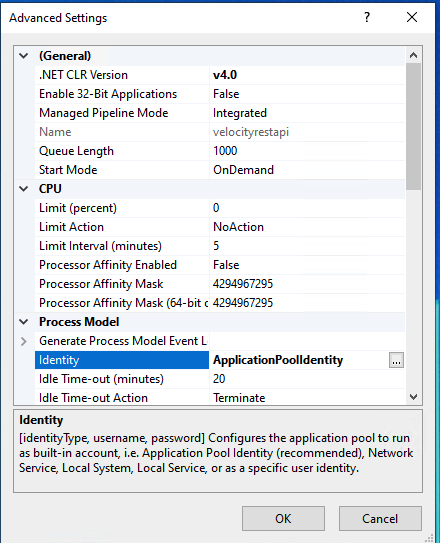
- Open Advanced Settings:
-
- In the right-hand Actions pane, click on "Advanced Settings."
-
- In the "Advanced Settings" window, locate the "Identity" option.
- Enter the credentials for your Velocity user.
- Restart the Website:
- After setting the user, restart the website context of the REST API.
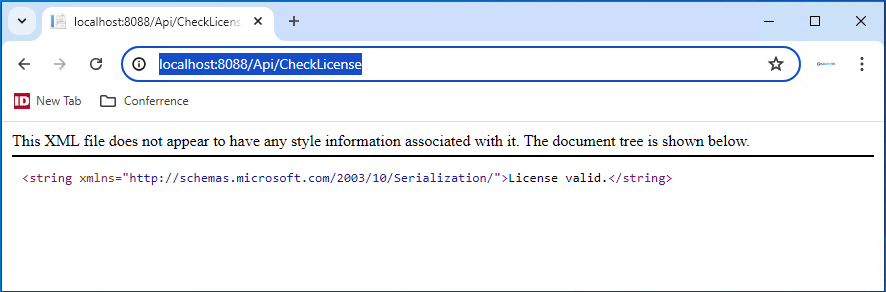
- Verify the Installation:
- Open a web browser and navigate to the check license endpoint to verify the installation:
http://localhost:8088/Api/CheckLicense
- Ensure everything is functioning correctly.
- Open a web browser and navigate to the check license endpoint to verify the installation:
IIS configuration
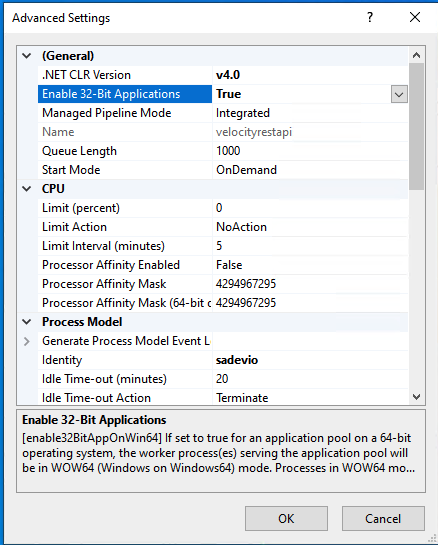
- Access Advanced Settings:
- Navigate to your application pool and select "Advanced Settings."
- Enable 32-Bit Applications:
- Set the "Enable 32-Bit Applications" option to
True.
- Set the "Enable 32-Bit Applications" option to
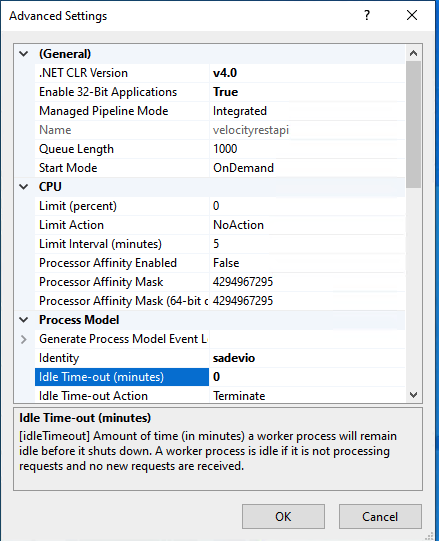
Configure Idle Time-out:
- Set the "Idle Time-out (minutes)" option to
0.
Generate Velocity REST API Password
-
Generate Password:
- Use the Velocity configuration tool to generate a password for the API.
- Enter the desired password in both text fields.

-
Configure Password:
- For Cloud Connector:
- Configure the generated password in the
appsettings.jsonfile.
- Configure the generated password in the
- For On-Premise System:
- Configure the generated password in the access system configuration.
- For Cloud Connector:
Sadevio On-Premise configuration
This section will focus on how to configure the SADEVIO system to activate the Velocity integration when running on-premise.
Configure the access system
-
Create a New Access System:
- Go to Maintenance.
- Select Access System.
- Click on Create New Access System.
-
Select Connector Type:
- Choose Identiv Velocity as the connector type.
-
Select Time Conversion:
- Choose use local time.
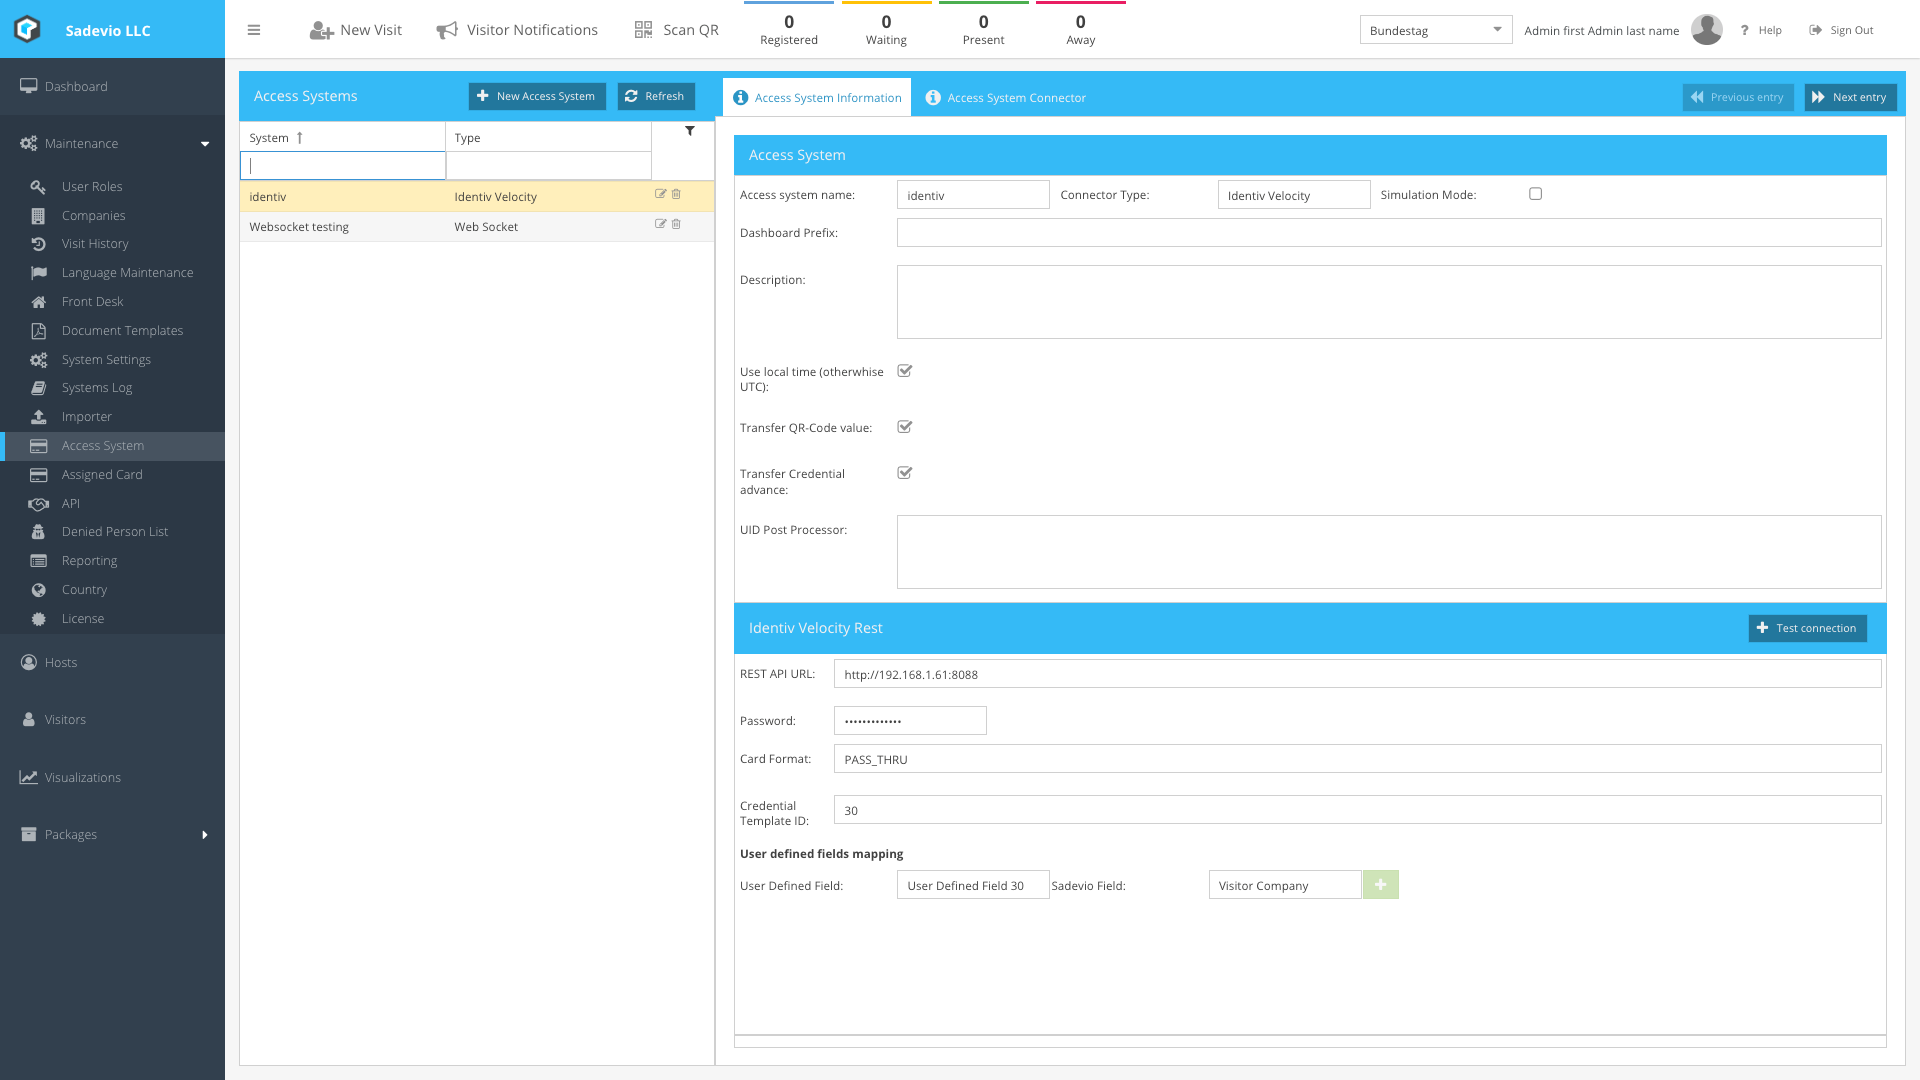
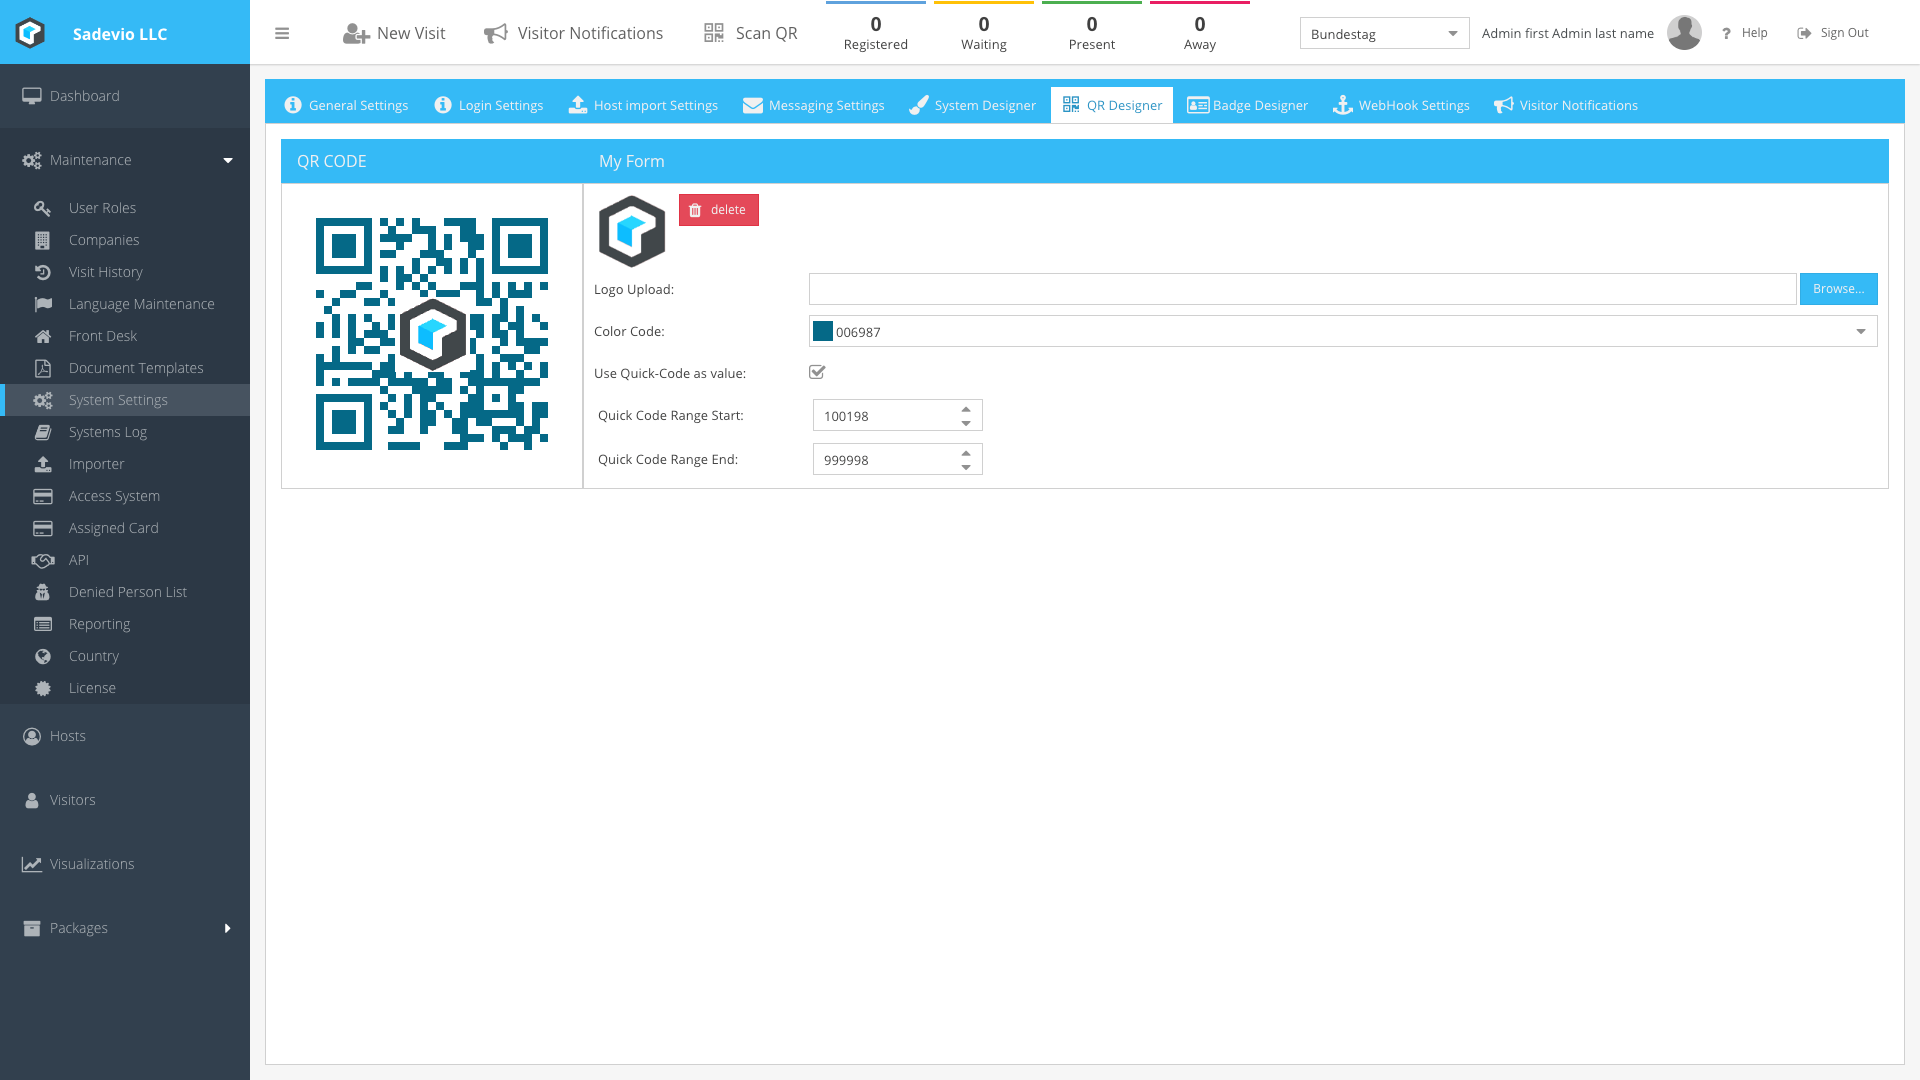
Configure the Velocity REST API
-
Set REST API URL:
- Enter the IP address and port for the Velocity REST API. e.g. http://192.168.1.61:8088
-
Enter Credentials:
- Provide the password generated with the Velocity configuration tool. See Generate API Password
-
Configure Card Format:
- Select the card format algorithm you want to use to generate the Velocity MATCH code. Refer to the Velocity Card Format Mapping section for details.
-
Set Credential Template ID:
- Enter the ID of your generated credential template in Velocity. Refer to the Configure Velocity Badge Template section for more information.
Configure User Defined Fields
-
Map SADEVIO Fields to Velocity Fields:
- Under the User Defined Fields section in the configuration, you can map SADEVIO fields to the corresponding user-defined fields in Velocity.
-
Populate Velocity Fields:
- The SADEVIO system will automatically populate the mapped information into the appropriate Velocity fields.

Configure Custom Card Data Transformation
In the UID Post Processor section, you can add custom JavaScript code to manipulate the actual transferred credential value. This is useful if you need to change the order of a card value or add a facility code in a QR code scenario.
The original value is stored in the variable cardNumber. Your code should return a value that represents the new credential value.
Example: Adding a Facility Code
The following example checks if the provided UID is 6 characters long. If it is, the code takes the last 5 characters and appends a prefix of 1755- to the value.
if(cardNumber != "" && cardNumber.length == 6 && cardNumber.startsWith('0')){
    var newUid = '1755-'+cardNumber.substr(1);
    return newUid;
}else{
    return cardNumber;
}
Place this code in the UID Post Processor section to achieve the desired transformation.
Sadevio Cloud System Connector
To connect your on-premise access control system, you can install the SADEVIO Cloud Connector service. This service facilitates the integration of the SADEVIO Cloud Solution with your access control system.
Overview
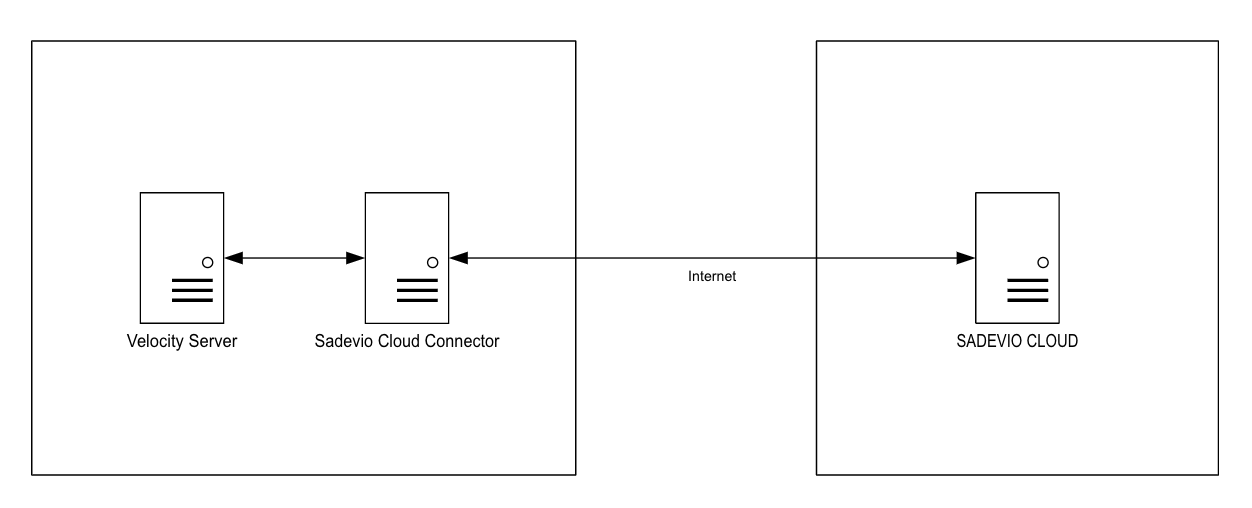
Download the Sadevio Cloud Connector and install it in the same network, where the Velocity Server is.
Configure Sadevio Cloud System.
-
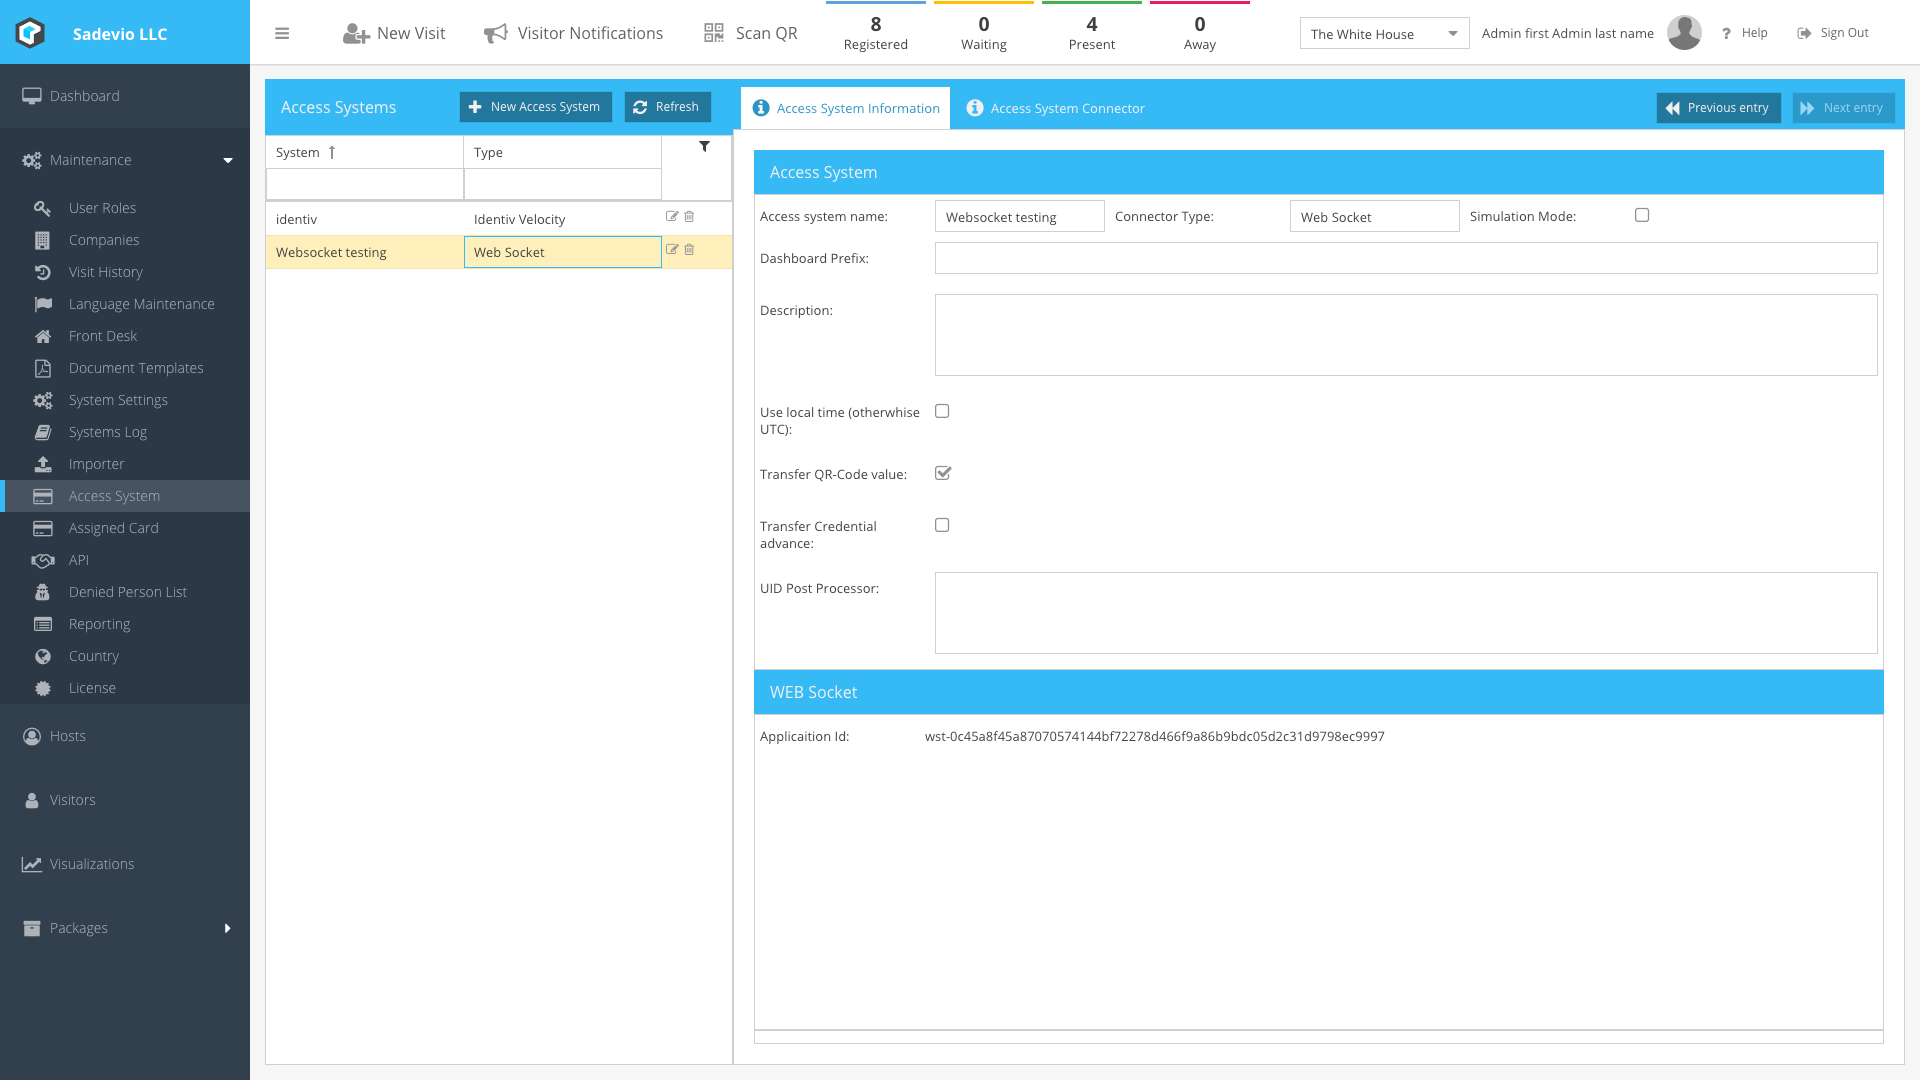
Create a New Access System:
- Navigate to the Maintenance section.
- Select Access System.
- Click on Create New Access System.
-
Set Connector Type:
- Select Web Socket as the access system connector type.
- This action will generate an application ID.
-
Record Application ID:
- Make a note of the generated application ID, as it will be needed for configuring the Cloud Connector.
Configure Sadevio Cloud Connector
-
Locate the Configuration File:
- The configuration file for the Sadevio Cloud Connector is named
appsettings.json. - You can find it in the
ProgramDatadirectory, usually located atC:\ProgramData\Sadevio.
- The configuration file for the Sadevio Cloud Connector is named
-
Open the Configuration File:
- Navigate to the
C:\ProgramData\Sadeviodirectory. - Open the
appsettings.jsonfile with a text editor.
- Navigate to the
-
Activate the Cloud Connector Function:
- In the
appsettings.jsonfile, ensure that the cloud connector function is activated and the application id set.
- In the

Configure Identiv Velocity features
-
Locate the Configuration Section:
- In the
appsettings.jsonfile, find the configuration section for the access system.
- In the
-
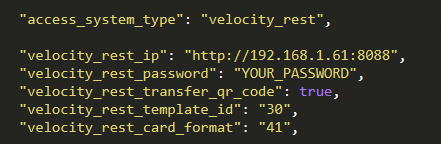
Set Access System Type:
- Set the
access_system_typetovelocity_rest.
- Set the
-
Enter Connection Details:
- Provide the IP address of your Velocity system.
- Enter the generated password. See Generate API Password
Example configuration in appsettings.json:
Configure Velocity Badge Template
-
Open Velocity Client:
- Launch your Velocity Client application.
-
Navigate to Credential Template Configuration:
- Go to Configuration.
- Select Velocity Configuration.
- Click on Credential Template.
-
Create a New Credential Template:
- Add the required functions as needed.
- Press OK to save the new credential template.
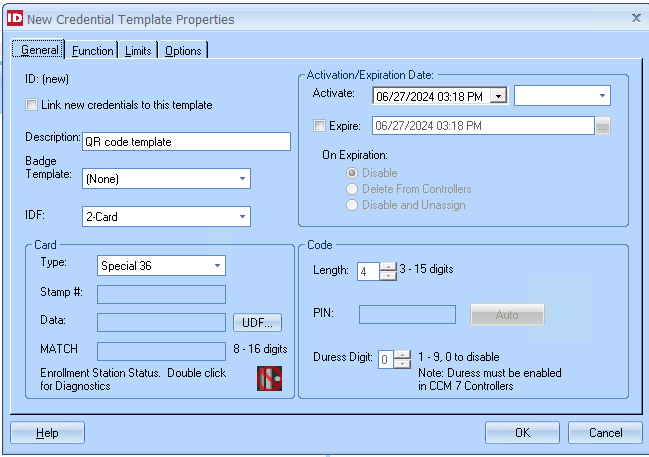
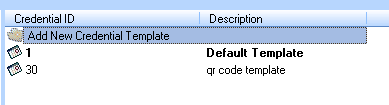
Retrieve and Configure Template ID:
-
- Note the template ID of the newly created credential template.
- Open the
appsettings.jsonfile. - Set the
velocity_rest_template_idto the template ID. For example, set it to30.
Configure Velocity Card Format
The card format configuration is used to determine which algorithm is used to generate the Velocity MATCH Code. Refer to the Velocity Card Format Mapping section in our documentation for details on the available algorithms.
To use "Special 36" for generating the MATCH CODE, follow these steps:
-
Locate the Configuration Section:
- In the
appsettings.jsonfile, find the configuration section for card format.
- In the
-
Set the Card Format:
- Configure the
velocity_rest_card_formatvariable to the appropriate value. For "Special 36," set it to41.
- Configure the
Velocity Card Format Mapping
For card creation you need to configure which format velocity has to use. Below you can see the mapping table and which id you need to configure in sadevio.
- STANDARD_26_BIT_WIEGAND = 1
- STANDARD_27_BIT_WIEGAND = 2
- STANDARD_28_BIT_WIEGAND = 3
- STANDARD_29_BIT_WIEGAND = 4
- ONE_FIELD_ABA = 5
- SPECIAL_1 = 6
- SPECIAL_2 = 7
- SPECIAL_3 = 8
- SPECIAL_4 = 9
- SPECIAL_5 = 10
- SPECIAL_6 = 11
- SPECIAL_7 = 12
- SPECIAL_8 = 13
- SPECIAL_9 = 14
- SPECIAL_10 = 15
- SPECIAL_11 = 16
- SPECIAL_12 = 17
- SPECIAL_13 = 18
- SPECIAL_14 = 19
- SPECIAL_15 = 20
- SPECIAL_16 = 21
- SPECIAL_17 = 22
- SPECIAL_18 = 23
- SPECIAL_19 = 24
- SPECIAL_20 = 25
- SPECIAL_21 = 26
- SPECIAL_22 = 27
- SPECIAL_23 = 28
- SPECIAL_24 = 29
- SPECIAL_25 = 30
- SPECIAL_26 = 31
- SPECIAL_27 = 32
- SPECIAL_28 = 33
- SPECIAL_29 = 34
- SPECIAL_30 = 35
- PASS_THRU = 36
- SPECIAL_32 = 37
- SPECIAL_33 = 38
- SPECIAL_34 = 39
- SPECIAL_35 = 40
- SPECIAL_36 = 41
- SPECIAL_37 = 42
- OCTAL_PASS_THRU = 43
- SPECIAL_39 = 44
- SPECIAL_200_BIT_FASCN = 45
- SPECIAL_200_BIT = 46
- CFMT_STD_WIEGAND_37E_PASS = 47
- CFMT_STD_WIEGAND_37NP_PASS = 48
- SPECIAL_CUSTOM21 = 100
Activate QR-Code generation in velocity
This section explains how to configure the QR code transaction for the access control system.
Configure transfer of qr code to the access control system
To transfer the QR code to the access control system, you need to activate the feature in the access control section.
Activate QR Code Transfer:
-
- Go to Maintenance.
- Select Access System.
- Choose your specific access system from the list.
- Activate the feature Transfer QR-code value.

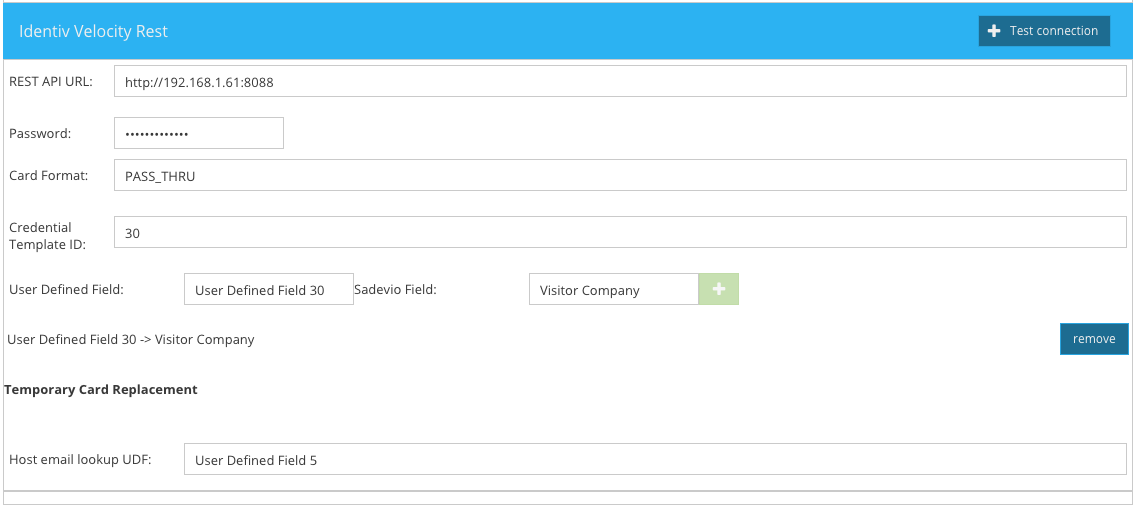
Configure QR code to use quick code value
When using Wiegand to read values with a QR code reader, you may encounter limitations on the length of values a QR code can use. To address this, you can configure SADEVIO to use the quick code as the value for the actual QR code. The range for quick codes can be from 000000 to 999999. These values are autogenerated but can be limited to a specific range if needed.
Transfer QR Code in Advance
Sometimes it is necessary to transfer the QR code to the access system in advance. For example, when the QR code should function independently of the visitor's check-in status, allowing the user to use the QR code immediately.
The QR code will be valid in the access control system according to the validity period configured for the specific visit.
Activate Advance QR Code Transfer:
-
- Go to Maintenance.
- Select Access System.
- Choose your specific access system from the list.
- Enable the feature Transfer credential in advance.
Temporary Card Replacement
Our temporary card replacement feature allows employees to create temporary access cards using the kiosk, for example, if they have forgotten their regular access card. The system will automatically deactivate all active cards in the access system and assign a new temporary card to the employee. Once the temporary card is returned, the system will restore the previous access settings.
A person can only create one temporary card at a time and cannot generate a new card if the previously issued card has not been returned.
Requirements
- You must have Velocity RESTful API version 1.9.7 or higher.
- The person in Velocity must have an email address specified in one of the UDF (User-Defined Fields).
- Each person with an email address can only exist once in the system.
Configure Sadevio System
Dashboard configuration
Kiosk configuration
-
Login to the admin section of the kiosk:
-
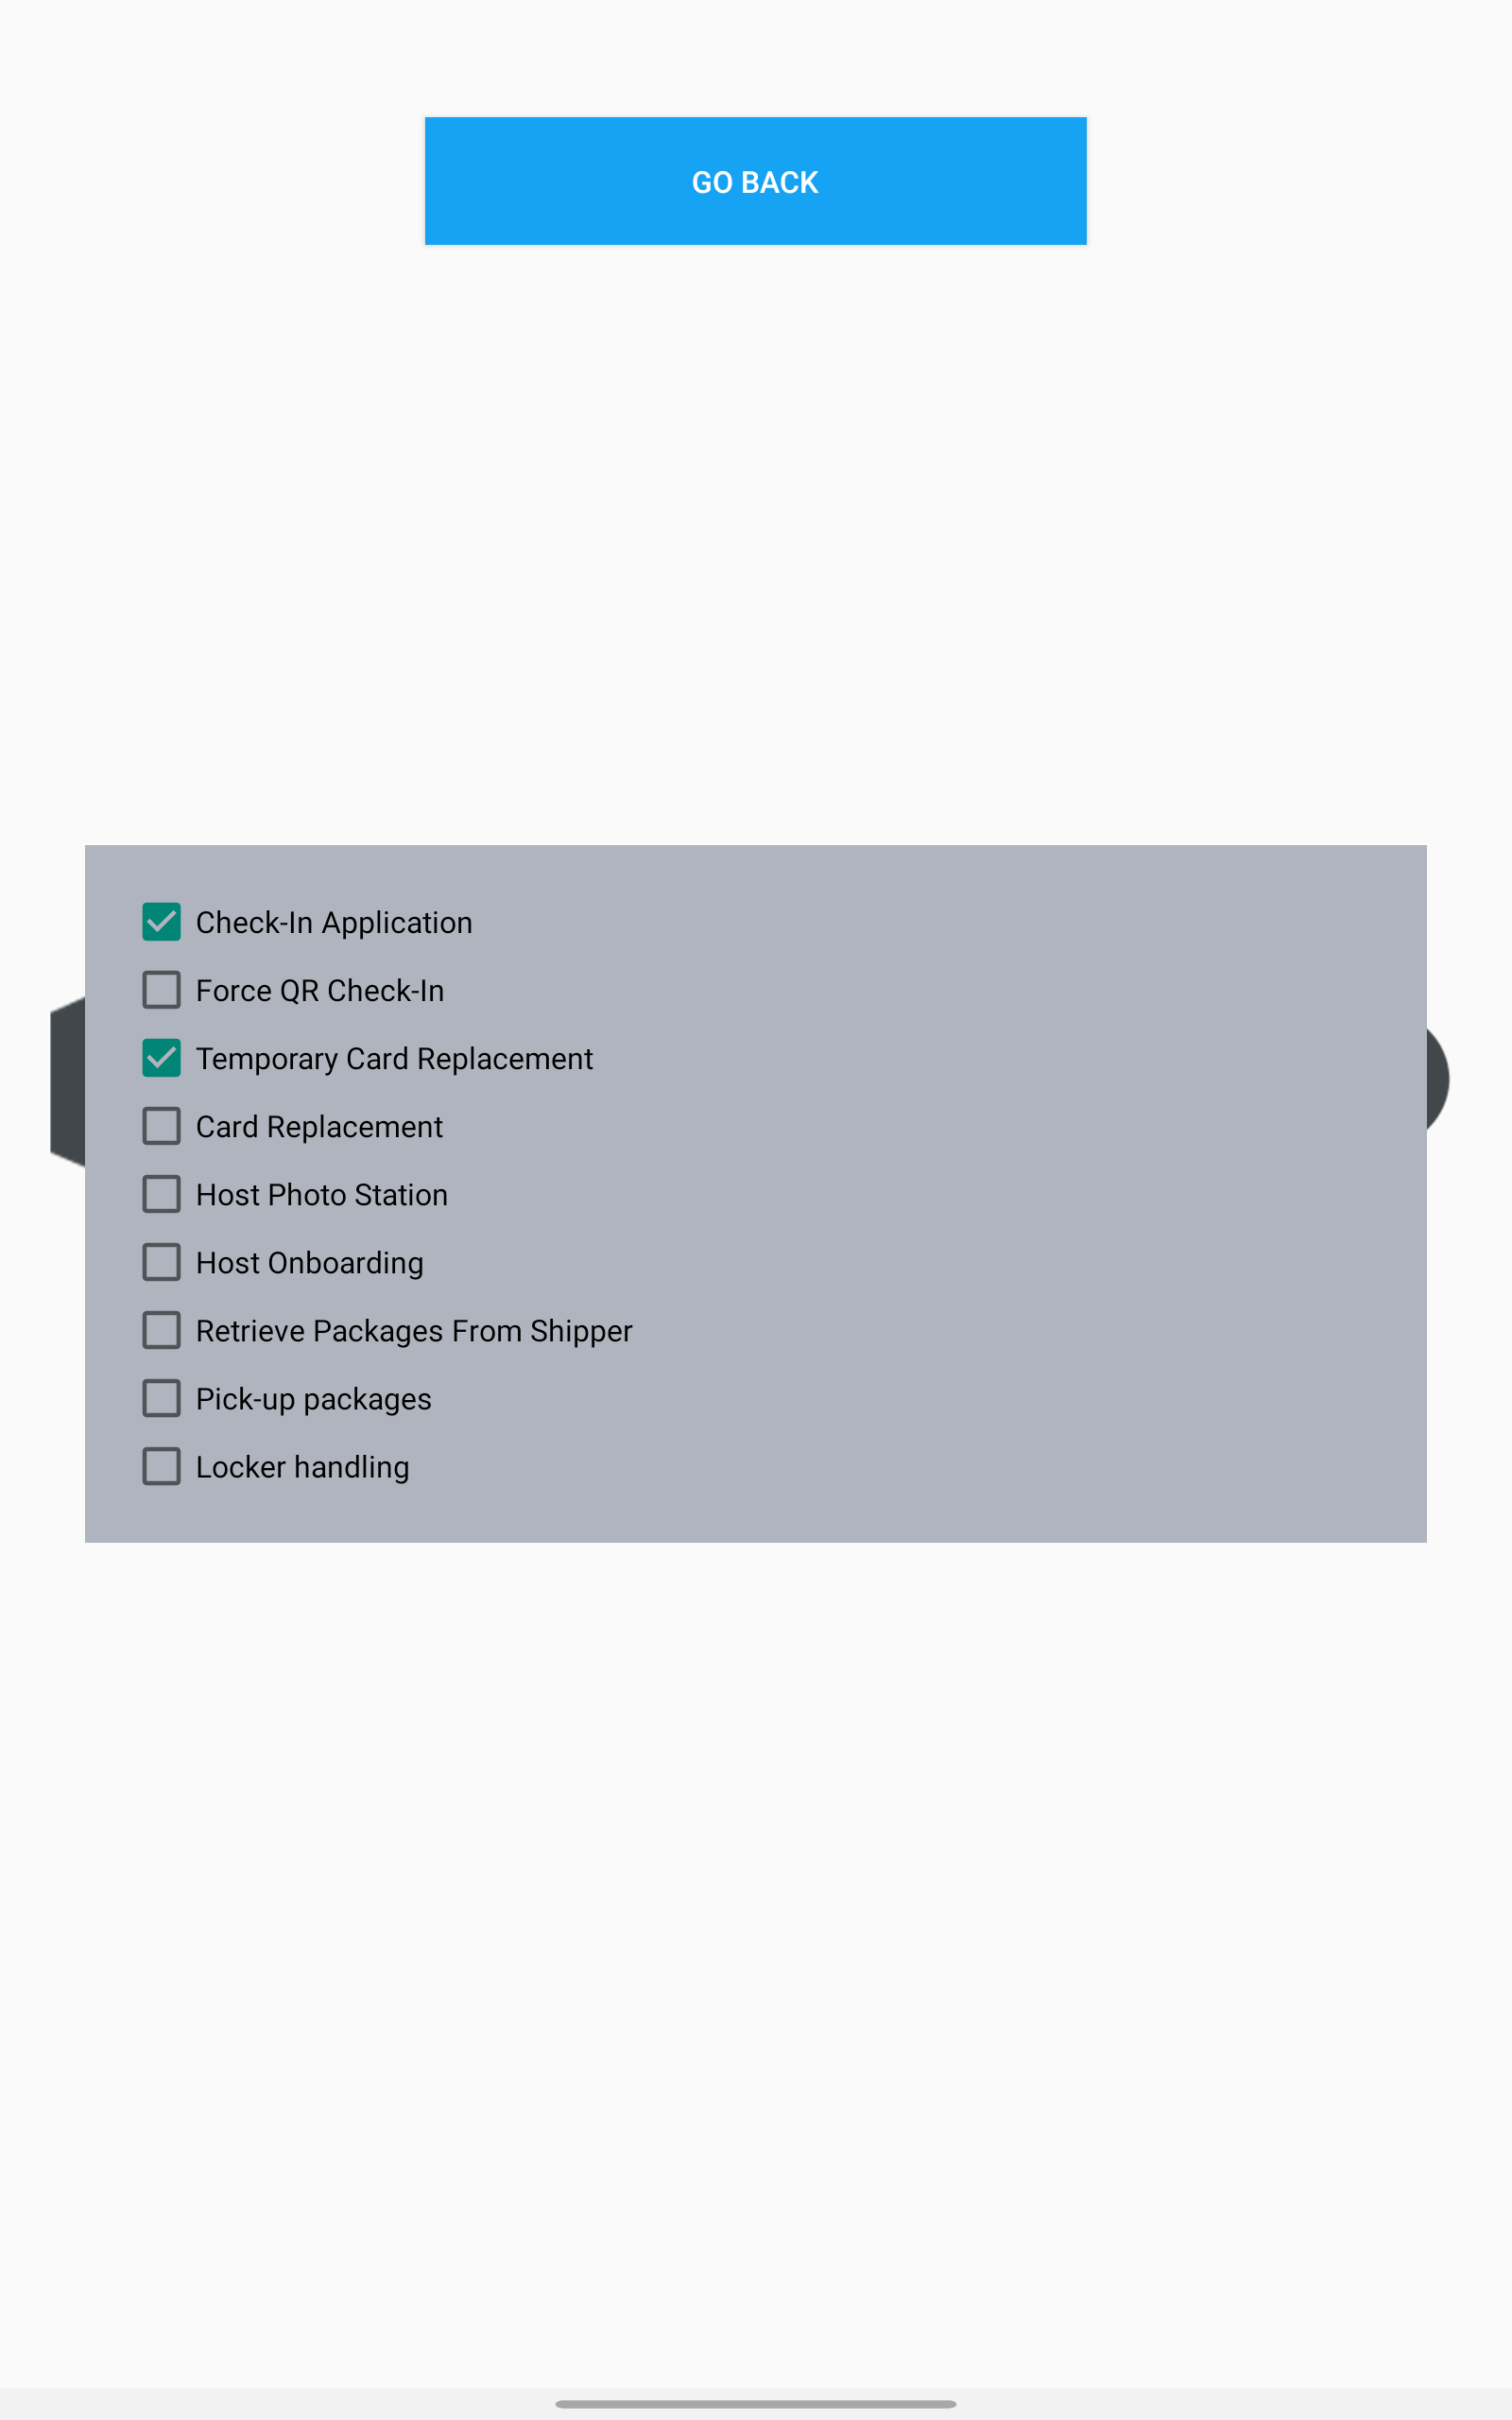
Activate Application Mode
- Navigate to Application Mode.
- Enable Temporary Card Replacement.

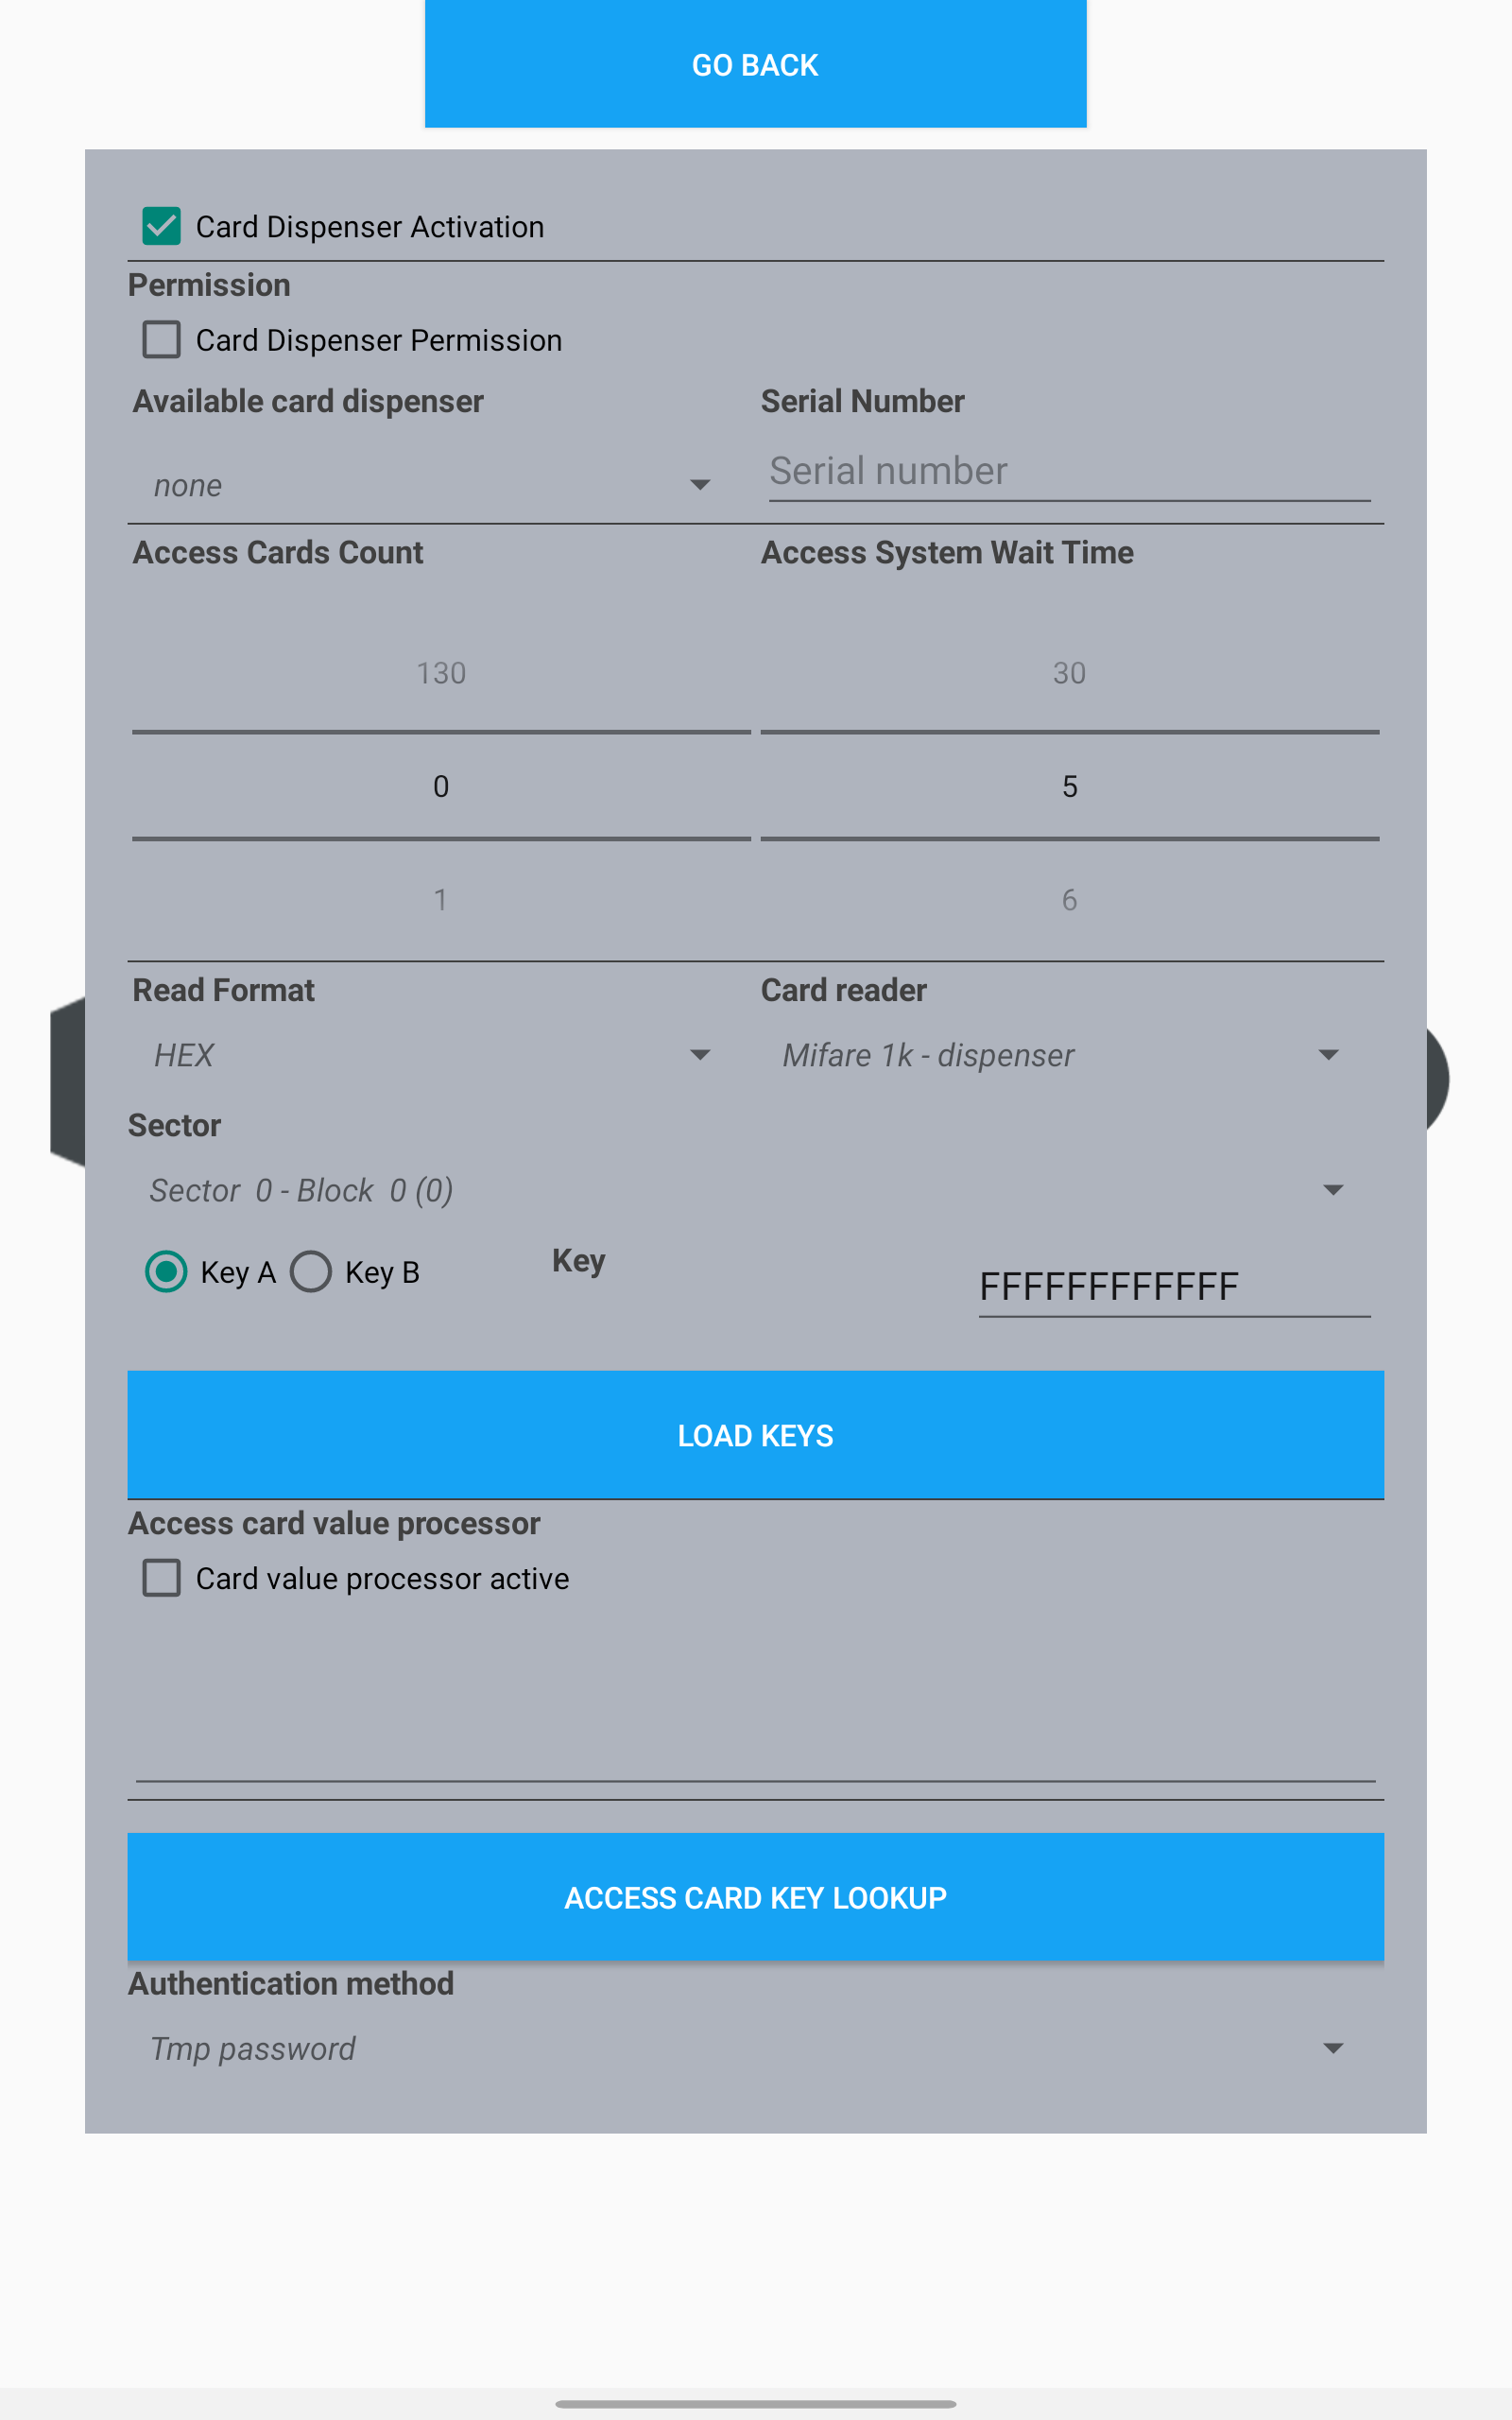
- Configure Card-Stacker
- Go to Devices
- Select CARD STACKER - CARD REPLACEMENT
- Configure Host Authentication
- Go to Devices
- Select CARD STACKER - Host-Authentication
- Find the Authentication Method
- Choose the authentication type (we recommend using Temporary Password).
This option will send a generated temporary code to the person, which they can use to authenticate at the kiosk. -

- Choose the authentication type (we recommend using Temporary Password).
Velocity configuration
Ensure that the person exists in Velocity and that the UDF field you selected for the email lookup is correctly populated.
The velocity data filed need to match the value which you have configure for the sadevio host field Access Card Id