Sadevio Cloud System Connector
To connect your on-premise access control system, you can install the sadevio cloud connector service to connect the sadevio Cloud Solution to your access control system.
Overview
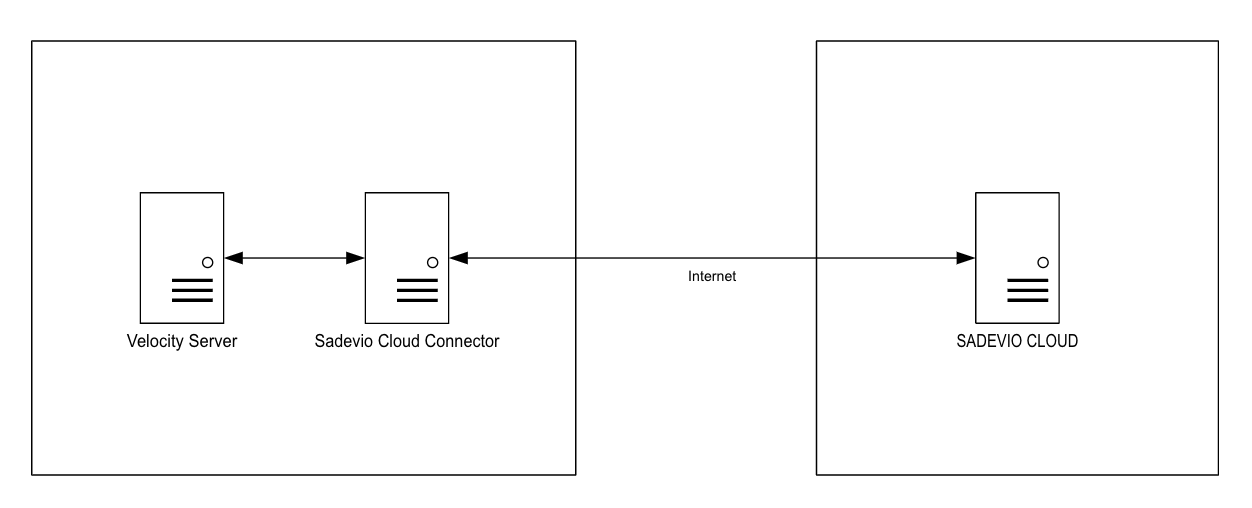
Download the Sadevio Cloud Connector and install it in the same network, where the Velocity Server is.
Configure Sadevio Cloud System.
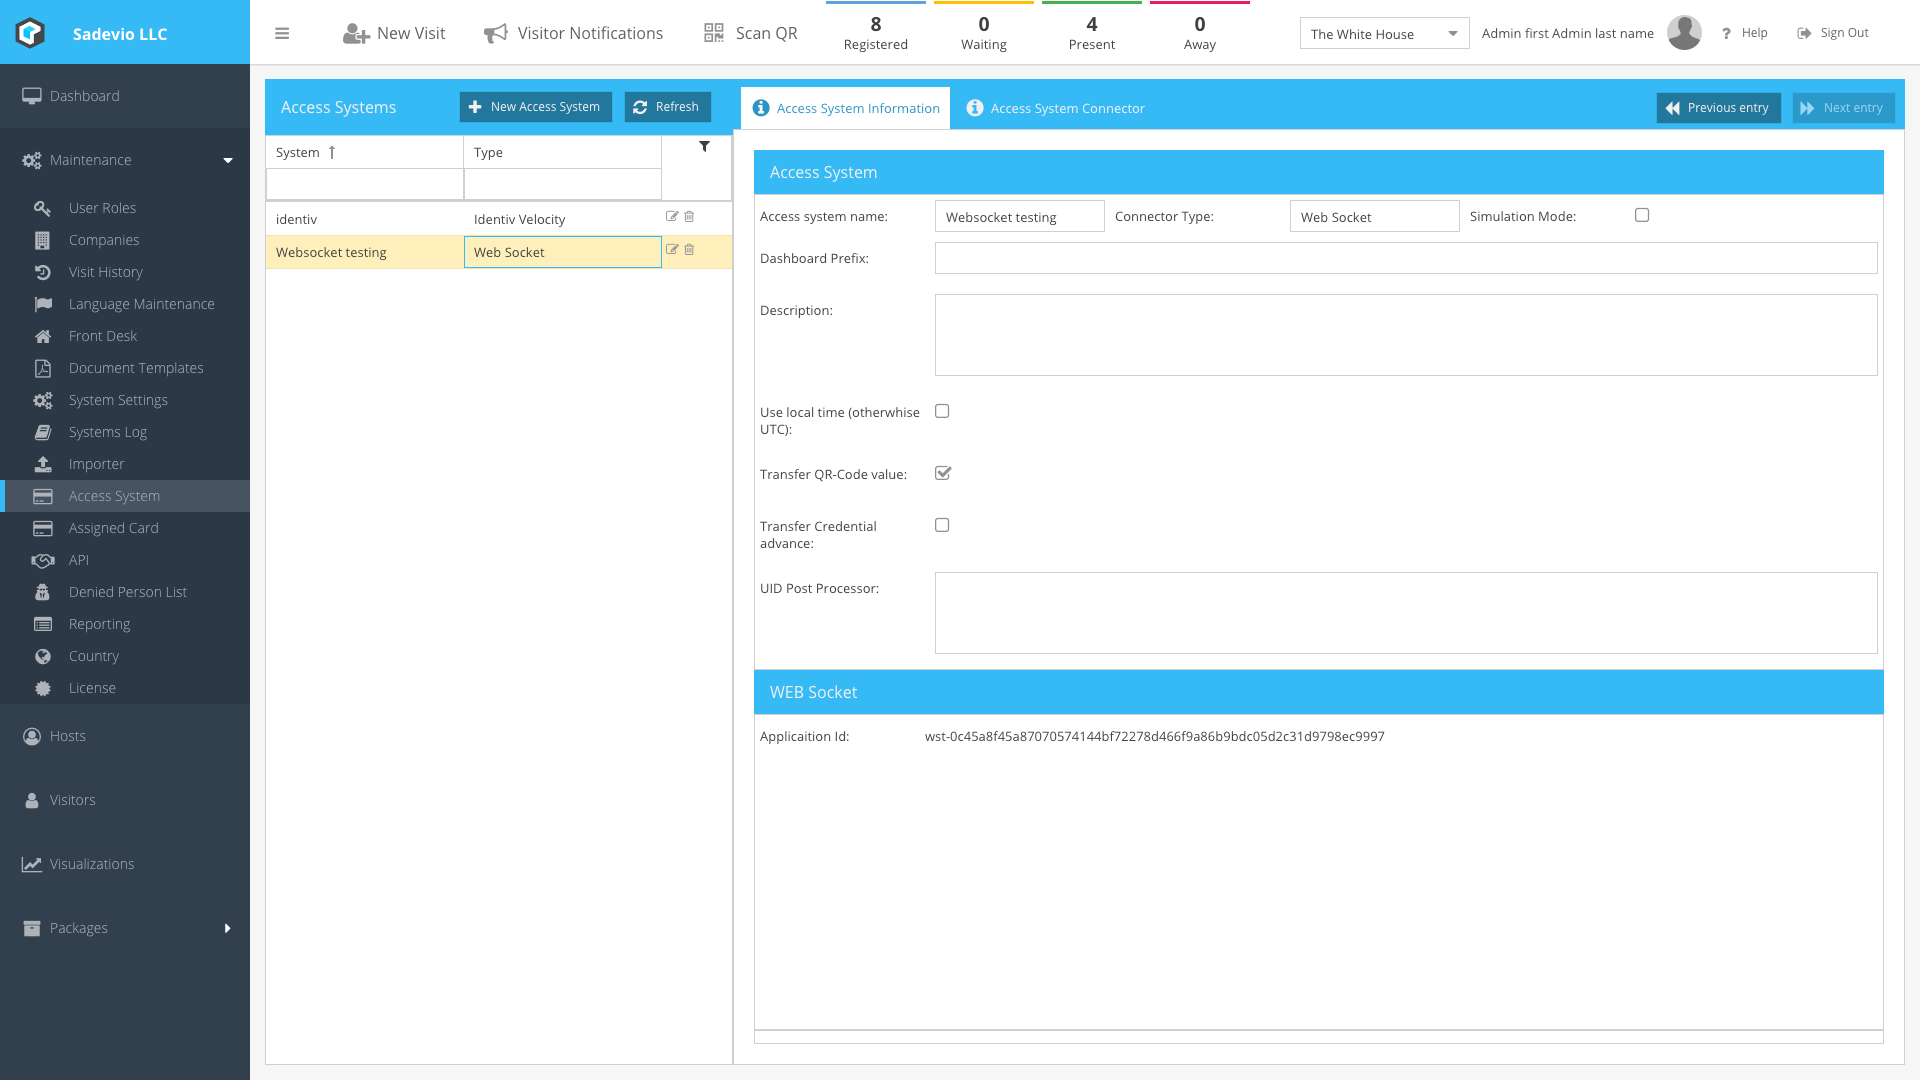
Go to Maintenance - Access System and create a new access system.
Select as Access system connector type Web Socket.
this will generate a application id, which you need to configure on your cloud connector with.
Configure Sadevio Cloud Connector
The Sadevio Cloud Connector configuration file is located int the ProgramData directory.directory file the filename appsettings.json
Usually under C:\ProgramData\Sadevio
Activate the cloud connector function.

Configure Identiv Velocity features
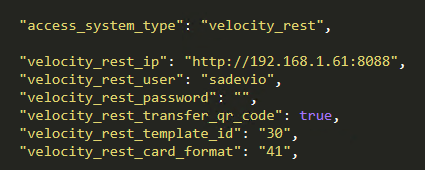
Locate following configuration in the appsettings.json file
Set the access_system_type to velocity_rest
Enter the IP address and the generated user and password
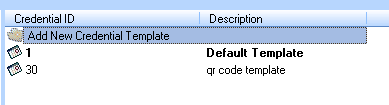
Configure Velocity Badge Template
Open your velocity Client and go to Configuration - Velocity Configuration - Credential Template
There you can create a new Credential Template. Add the required
functions are as you wish.
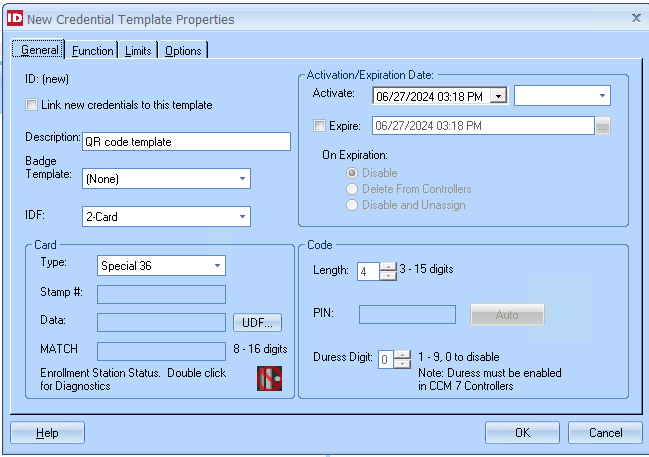
After you have pressed ok to save the new credential template. You need to add the template id to the appsettings.json
Set the velocity_rest_template_id to 30 in this example
Configure Velocity Card Format
The card format configuration is used to determine which algorithm is used to generate the Velocity MATCH Code.
We have one section in our documentation which shows you the mapping of the algorithm.
So let say we would like to use "Special 36" to generate the MATCH CODE
you then need to configure in the sadevio appsettings.json the variable "velocity_rest_card_format" to 41.