Sadevio Cloud System Connector
To connect your on-premise access control system, you can install the SADEVIO Cloud Connector service. This service facilitates the integration of the SADEVIO Cloud Solution with your access control system.
Overview
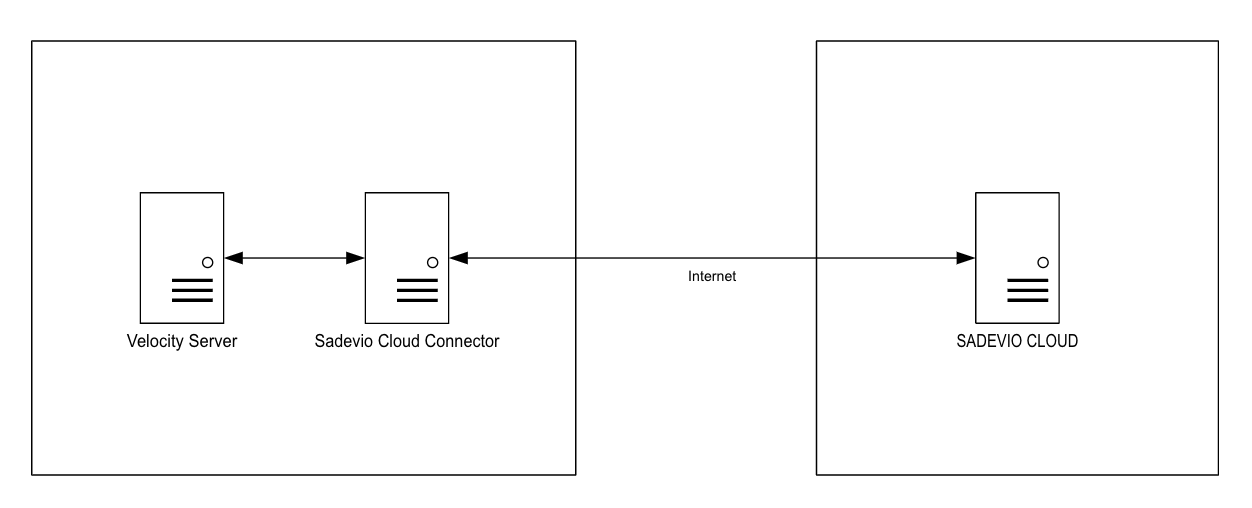
Download the Sadevio Cloud Connector and install it in the same network, where the Velocity Server is.
Configure Sadevio Cloud System.
-
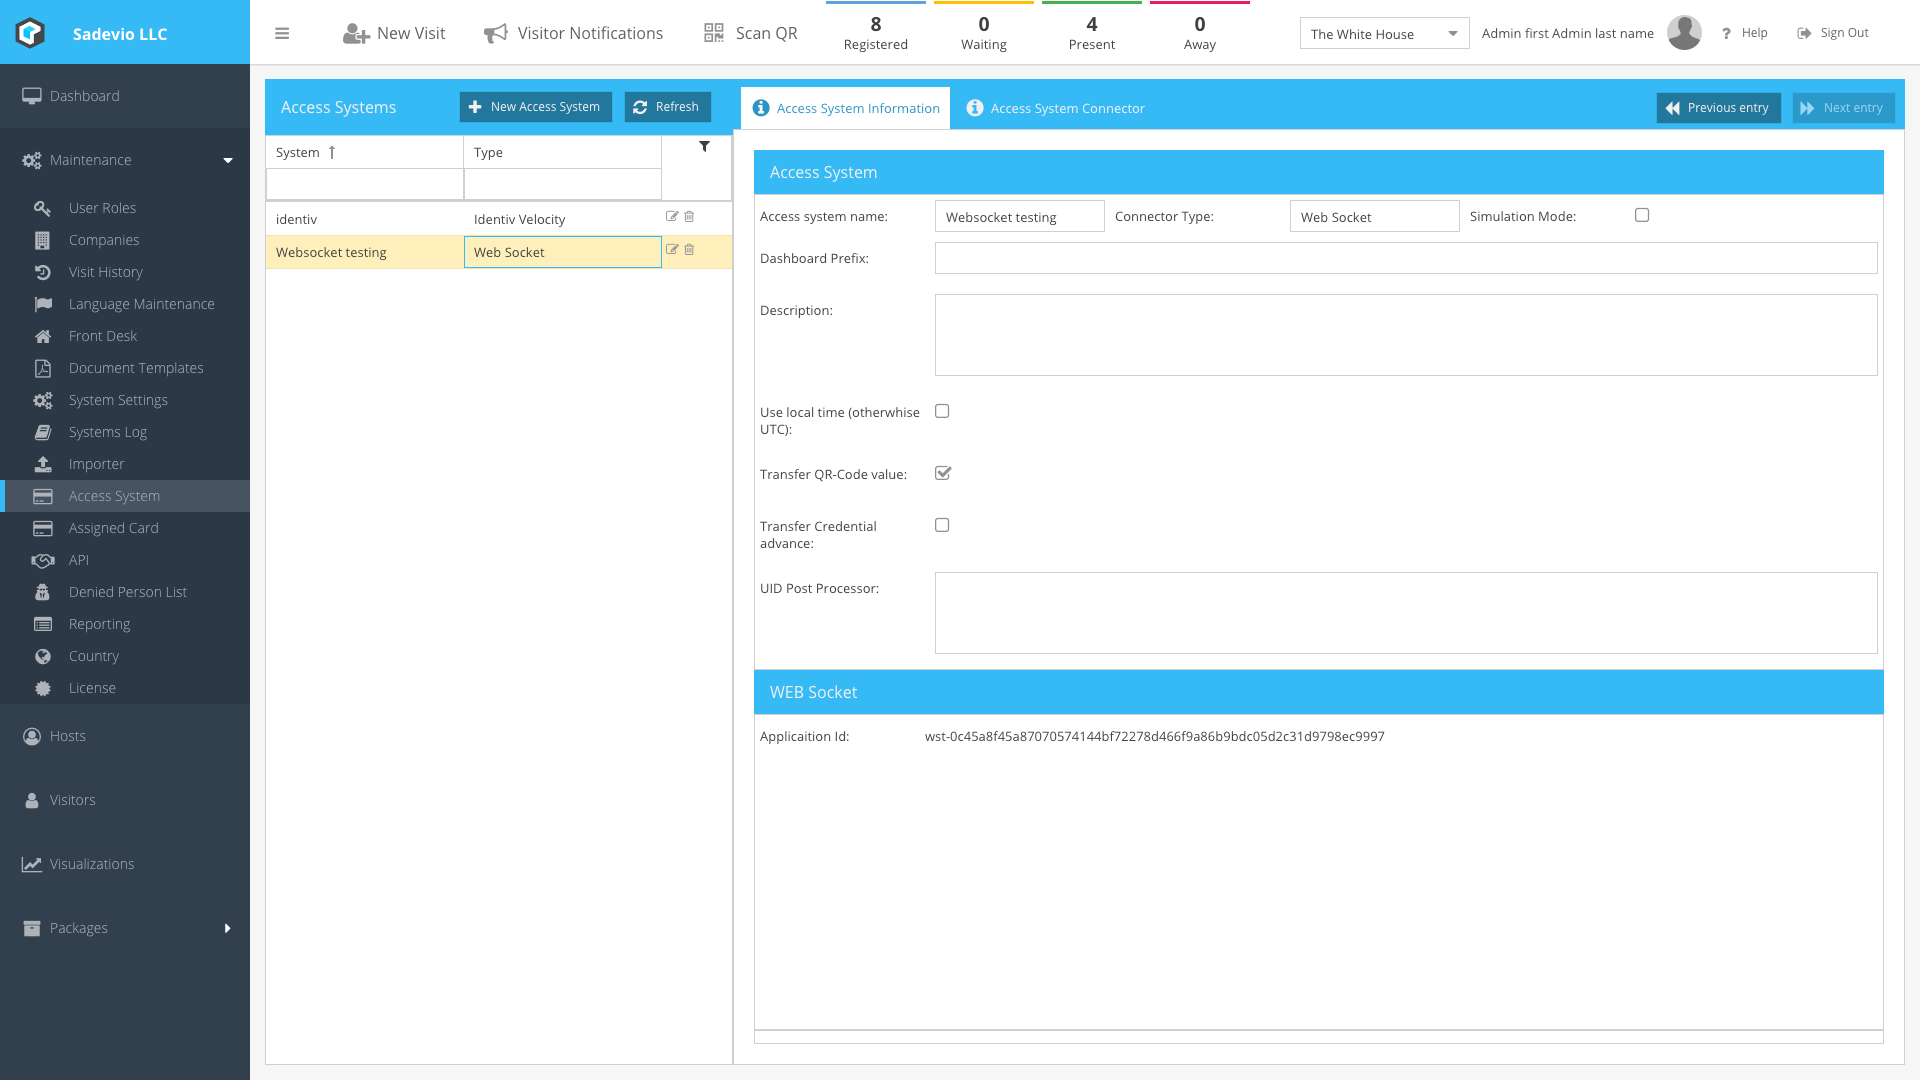
Create a New Access System:
- Navigate to the Maintenance section.
- Select Access System.
- Click on Create New Access System.
-
Set Connector Type:
- Select Web Socket as the access system connector type.
- This action will generate an application ID.
-
Record Application ID:
- Make a note of the generated application ID, as it will be needed for configuring the Cloud Connector.
Generate Velocity REST API Password
-
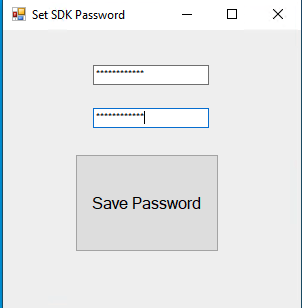
Generate Password:
- Use the Velocity configuration tool to generate a password for the API.
- Enter the desired password in both text fields.
-
Configure Password in SADEVIO:
- Use the generated password in the
appsettings.jsonfile for the SADEVIO configuration.
- Use the generated password in the
Configure Sadevio Cloud Connector
-
Locate the Configuration File:
- The configuration file for the Sadevio Cloud Connector is named
appsettings.json. - You can find it in the
ProgramDatadirectory, usually located atC:\ProgramData\Sadevio.
- The configuration file for the Sadevio Cloud Connector is named
-
Open the Configuration File:
- Navigate to the
C:\ProgramData\Sadeviodirectory. - Open the
appsettings.jsonfile with a text editor.
- Navigate to the
-
Activate the Cloud Connector Function:
- In the
appsettings.jsonfile, ensure that the cloud connector function is activated and the application id set.
- In the

Configure Identiv Velocity features
-
Locate the Configuration Section:
- In the
appsettings.jsonfile, find the configuration section for the access system.
- In the
-
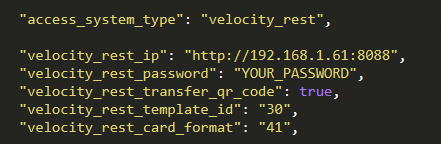
Set Access System Type:
- Set the
access_system_typetovelocity_rest.
- Set the
-
Enter Connection Details:
- Provide the IP address of your Velocity system.
- Enter the generated
user andpassword.
Example configuration in appsettings.json:
Configure Velocity Badge Template
-
Open Velocity Client:
- Launch your Velocity Client application.
-
Navigate to Credential Template Configuration:
- Go to Configuration.
- Select Velocity Configuration.
- Click on Credential Template.
-
Create a New Credential Template:
- Add the required functions as needed.
- Press OK to save the new credential template.
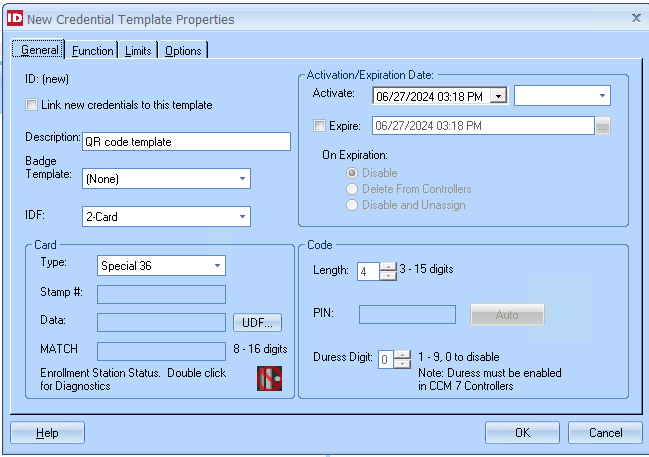
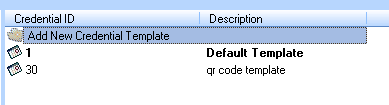
Retrieve and Configure Template ID:
-
- Note the template ID of the newly created credential template.
- Open the
appsettings.jsonfile. - Set the
velocity_rest_template_idto the template ID. For example, set it to30.
Configure Velocity Card Format
The card format configuration is used to determine which algorithm is used to generate the Velocity MATCH Code. Refer to the Velocity Card Format Mapping section in our documentation for details on the available algorithms.
To use "Special 36" for generating the MATCH CODE, follow these steps:
-
Locate the Configuration Section:
- In the
appsettings.jsonfile, find the configuration section for card format.
- In the
-
Set the Card Format:
- Configure the
velocity_rest_card_formatvariable to the appropriate value. For "Special 36," set it to41.
- Configure the