Azure Entra ID (Azure AD) – Employee syncronistaion
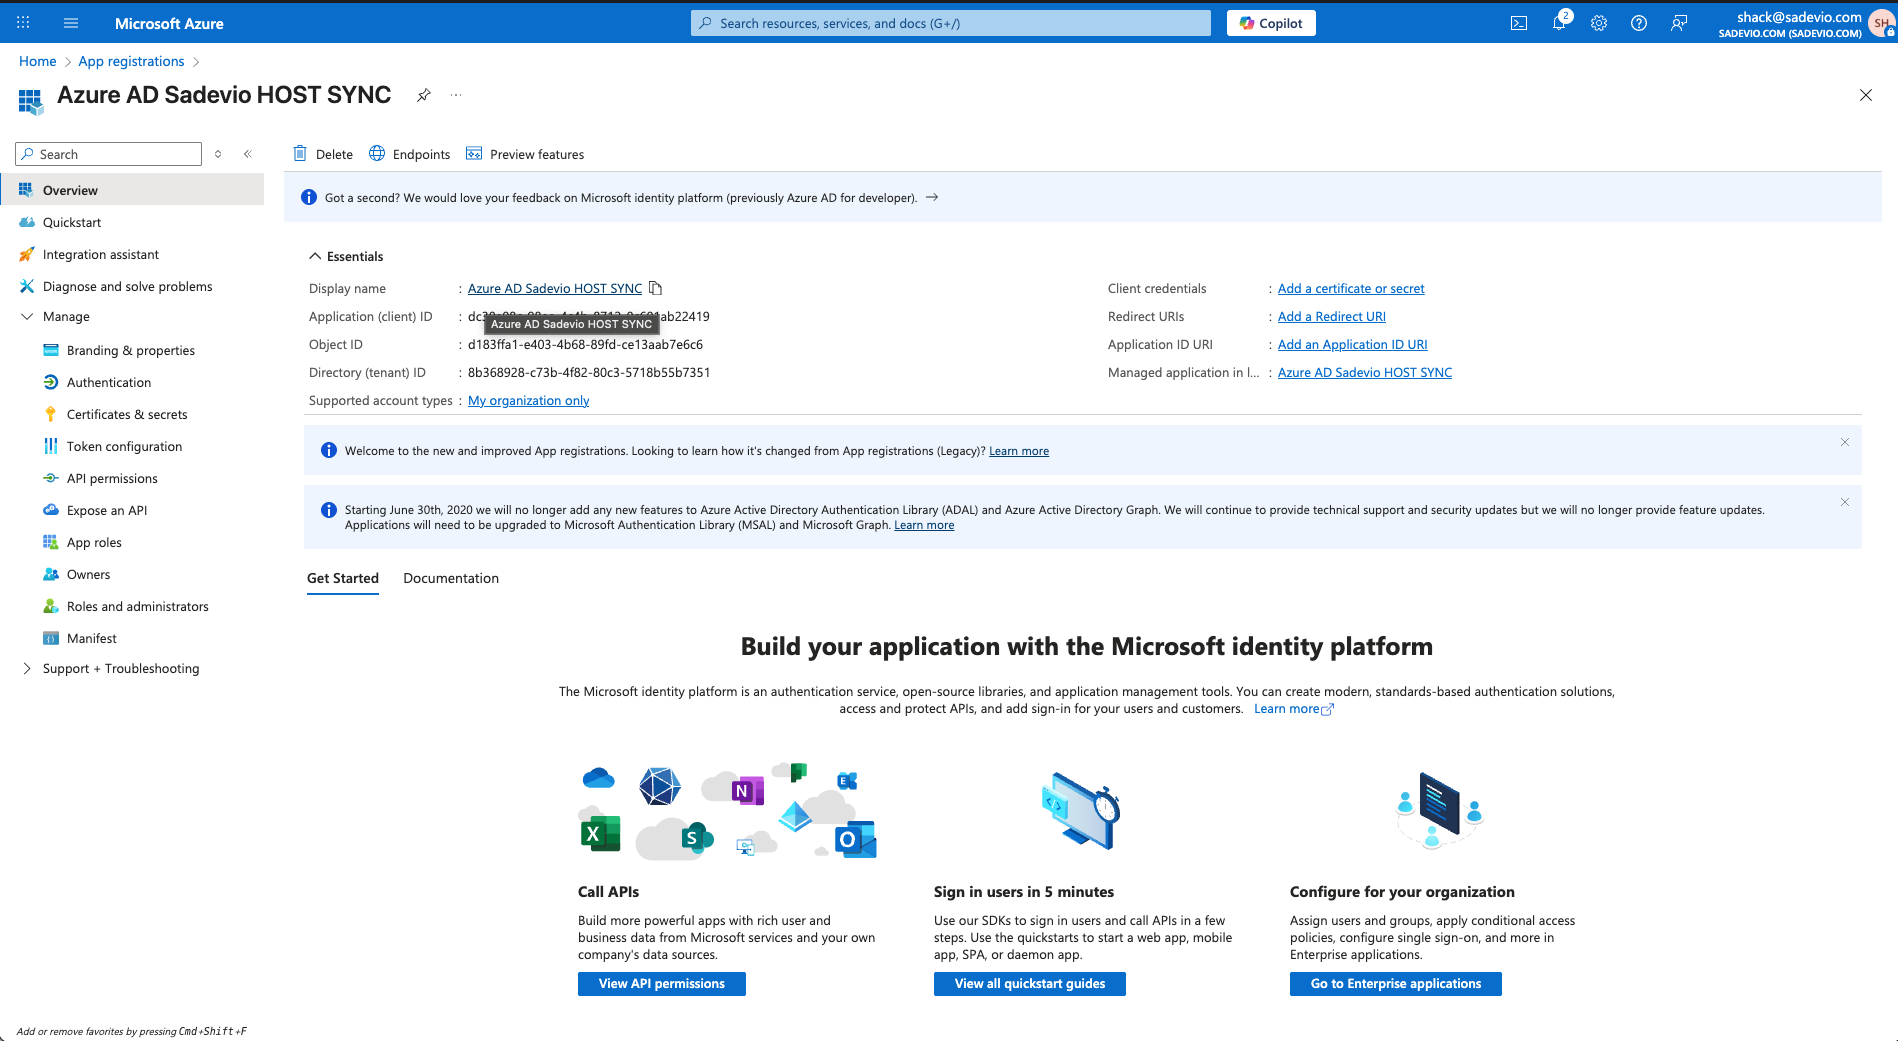
Step 1: Create an Enterprise Application
-
In the left menu, click "App registrations"
-
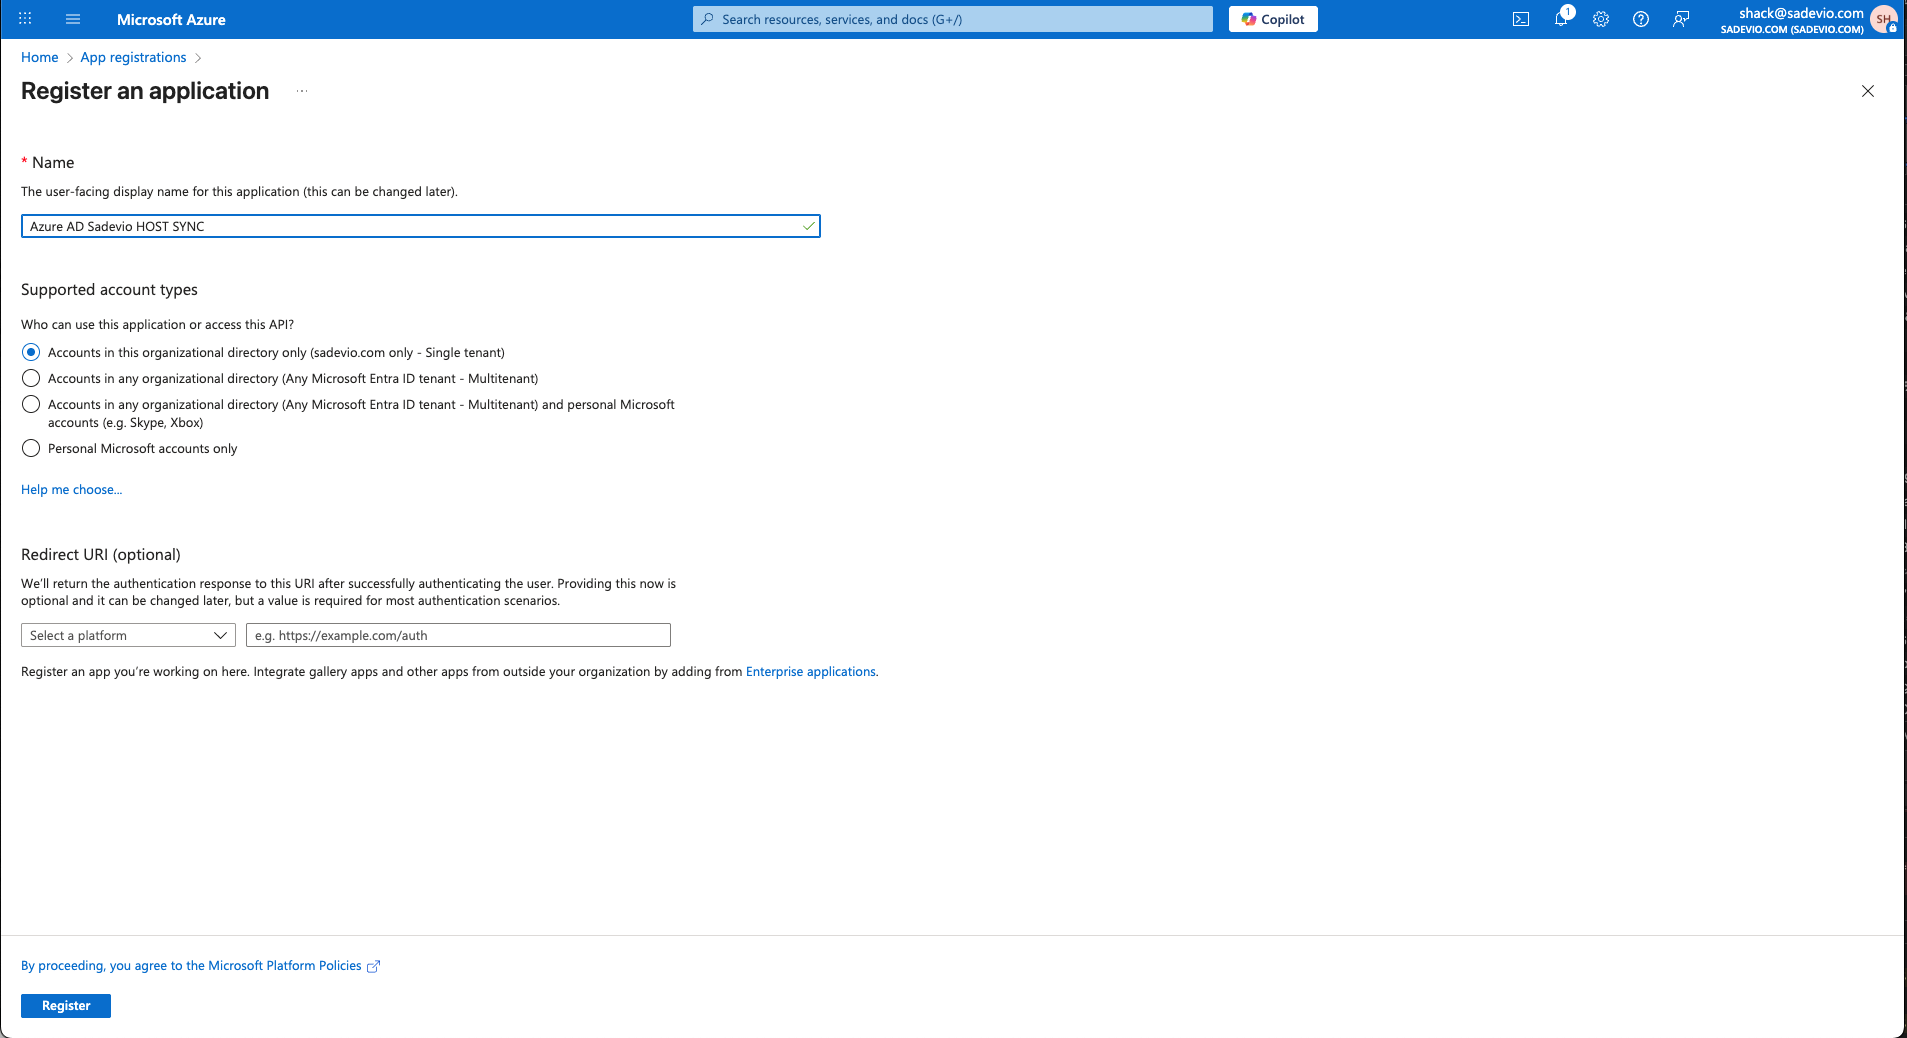
Click "+ New registration"
-
Select "Create your own application"
-
Enter a name (e.g.
Sadevio Employee SYNC) - Click Register
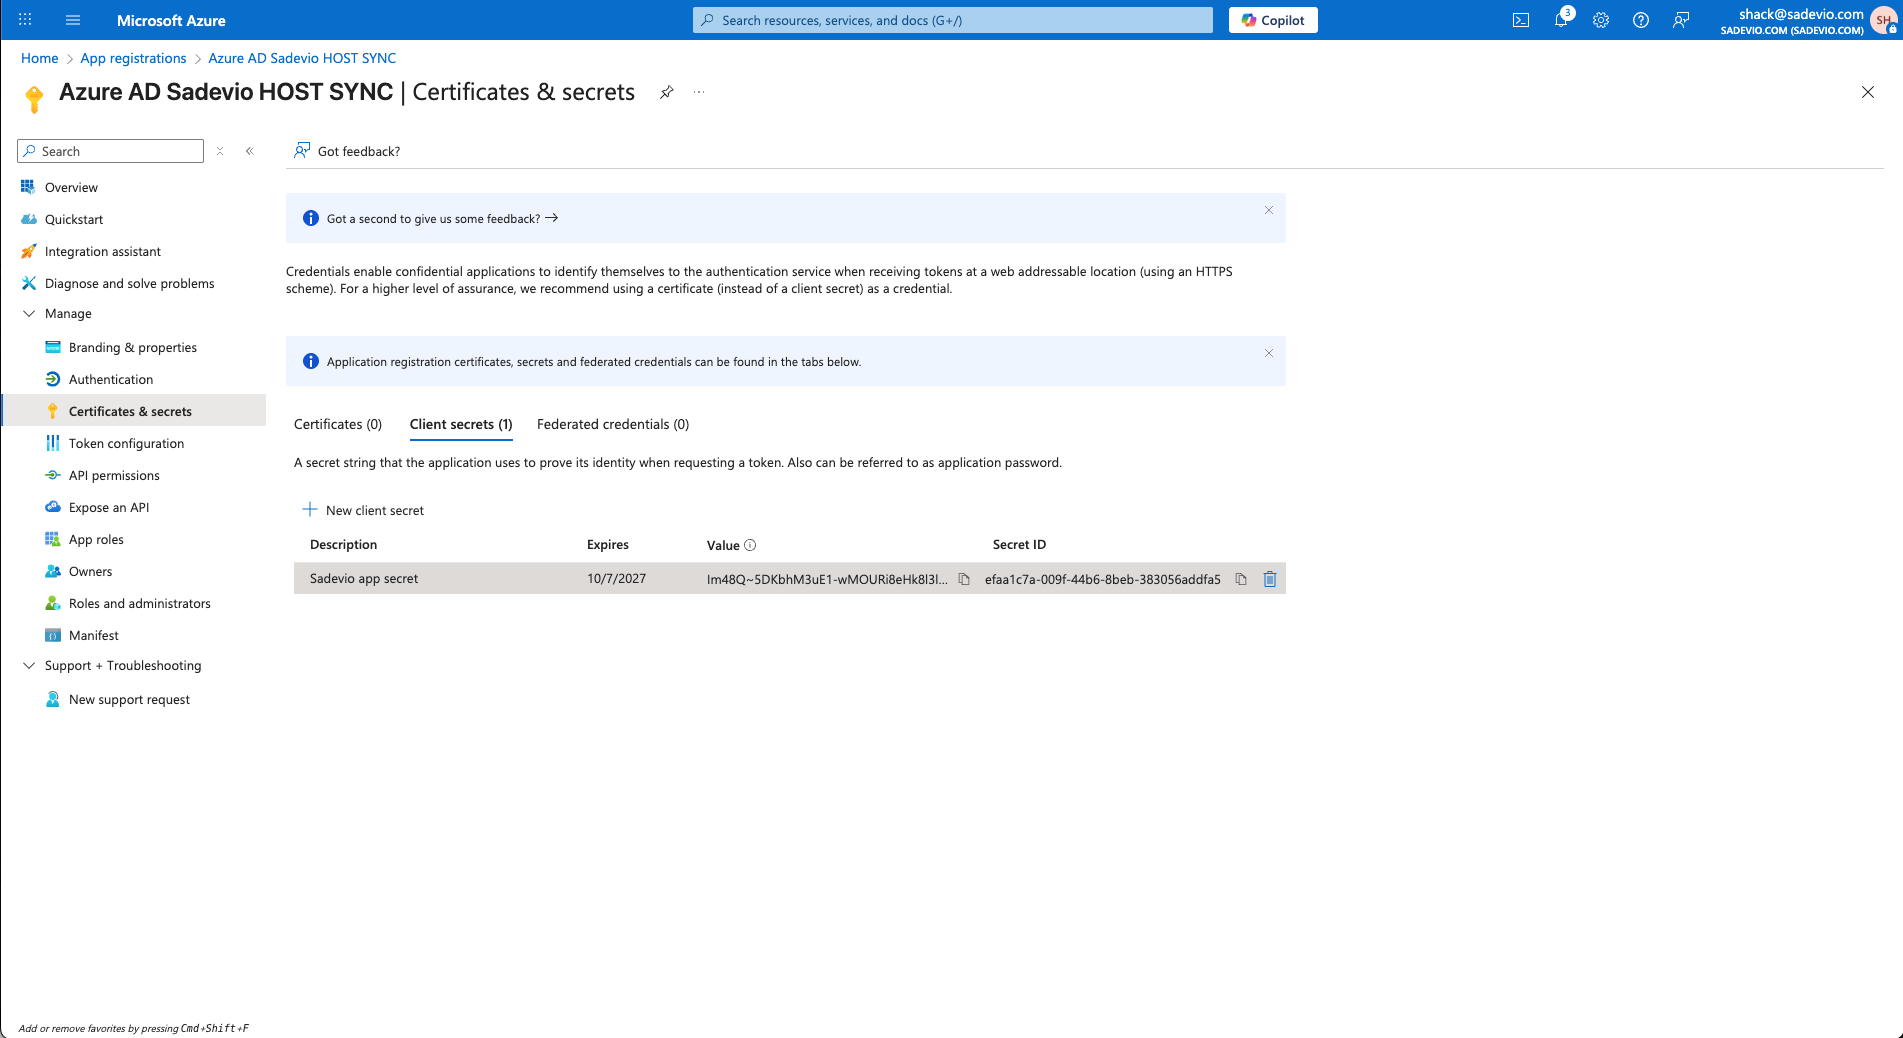
Step 2: Client Secret
-
In the new app, go to "Manage" -> "Certificates & secrets"
-
Select New client secret
-
Give it a name which you like and an expiration date.
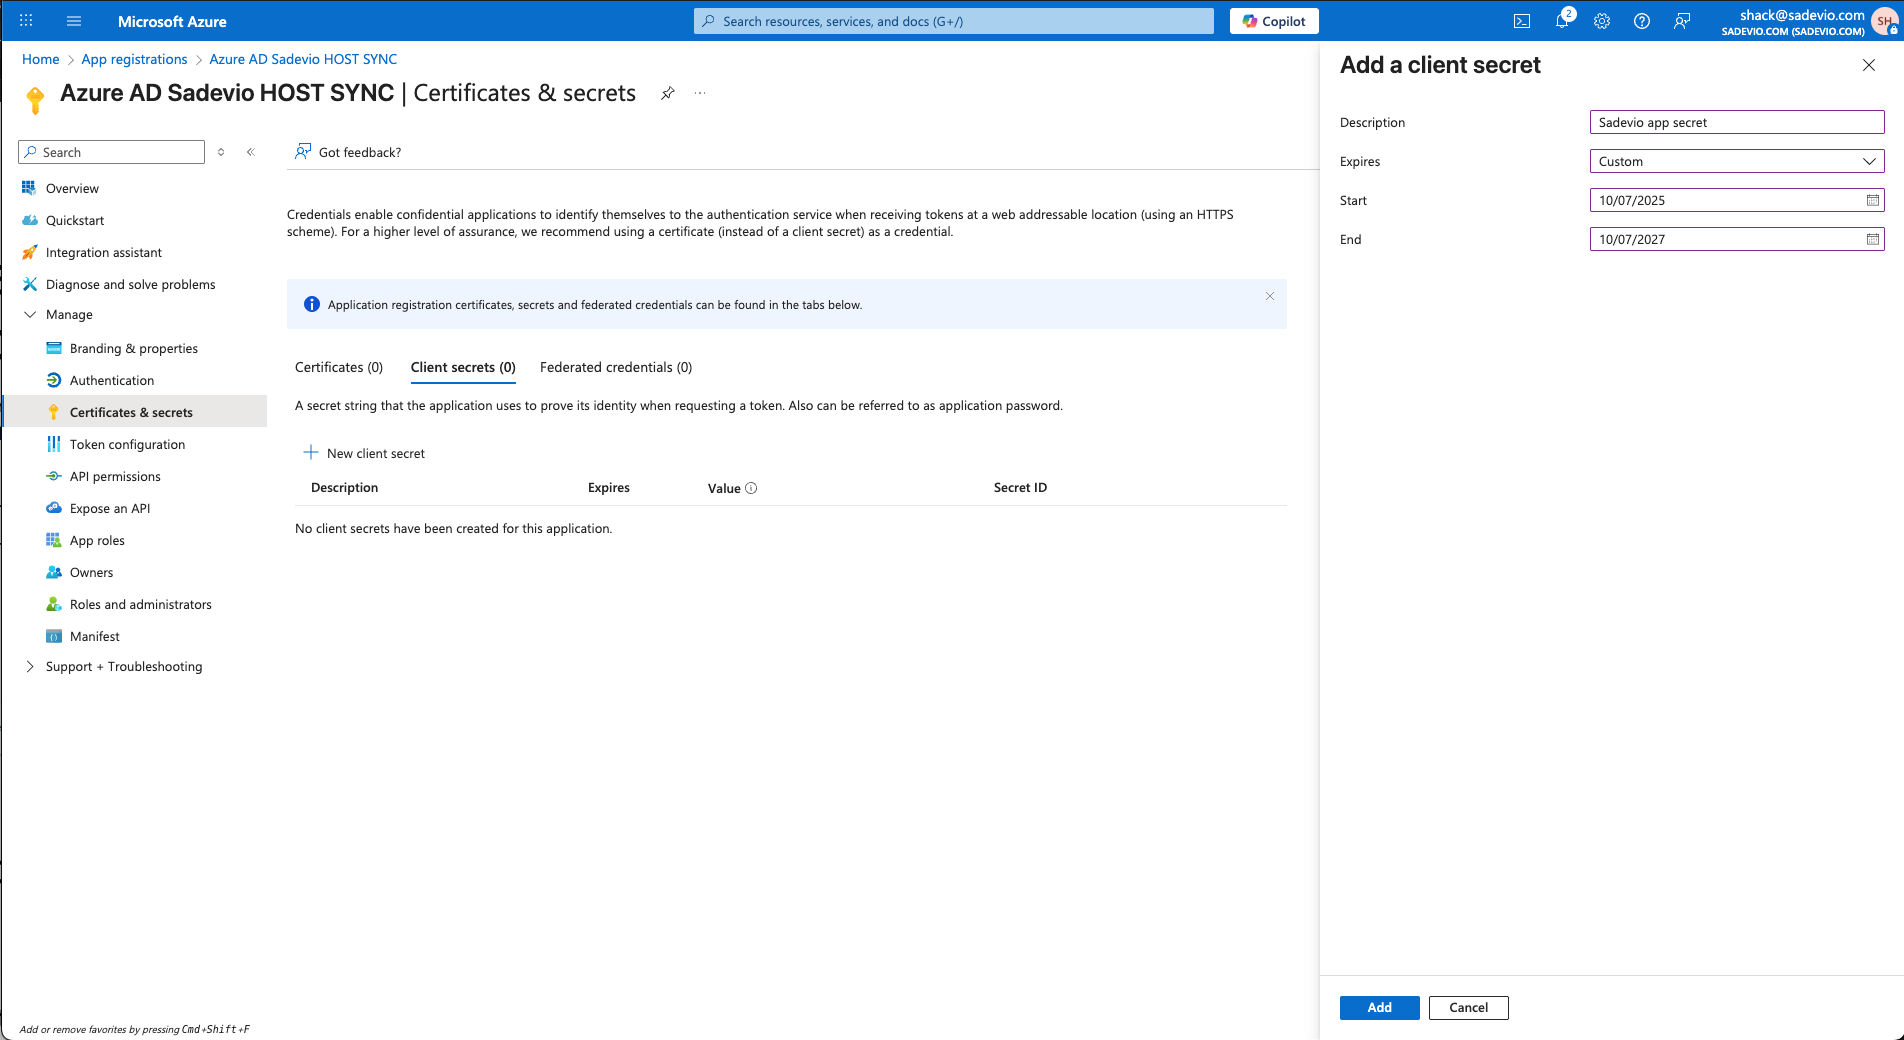
You will need to copy the "value" part to sadevio.
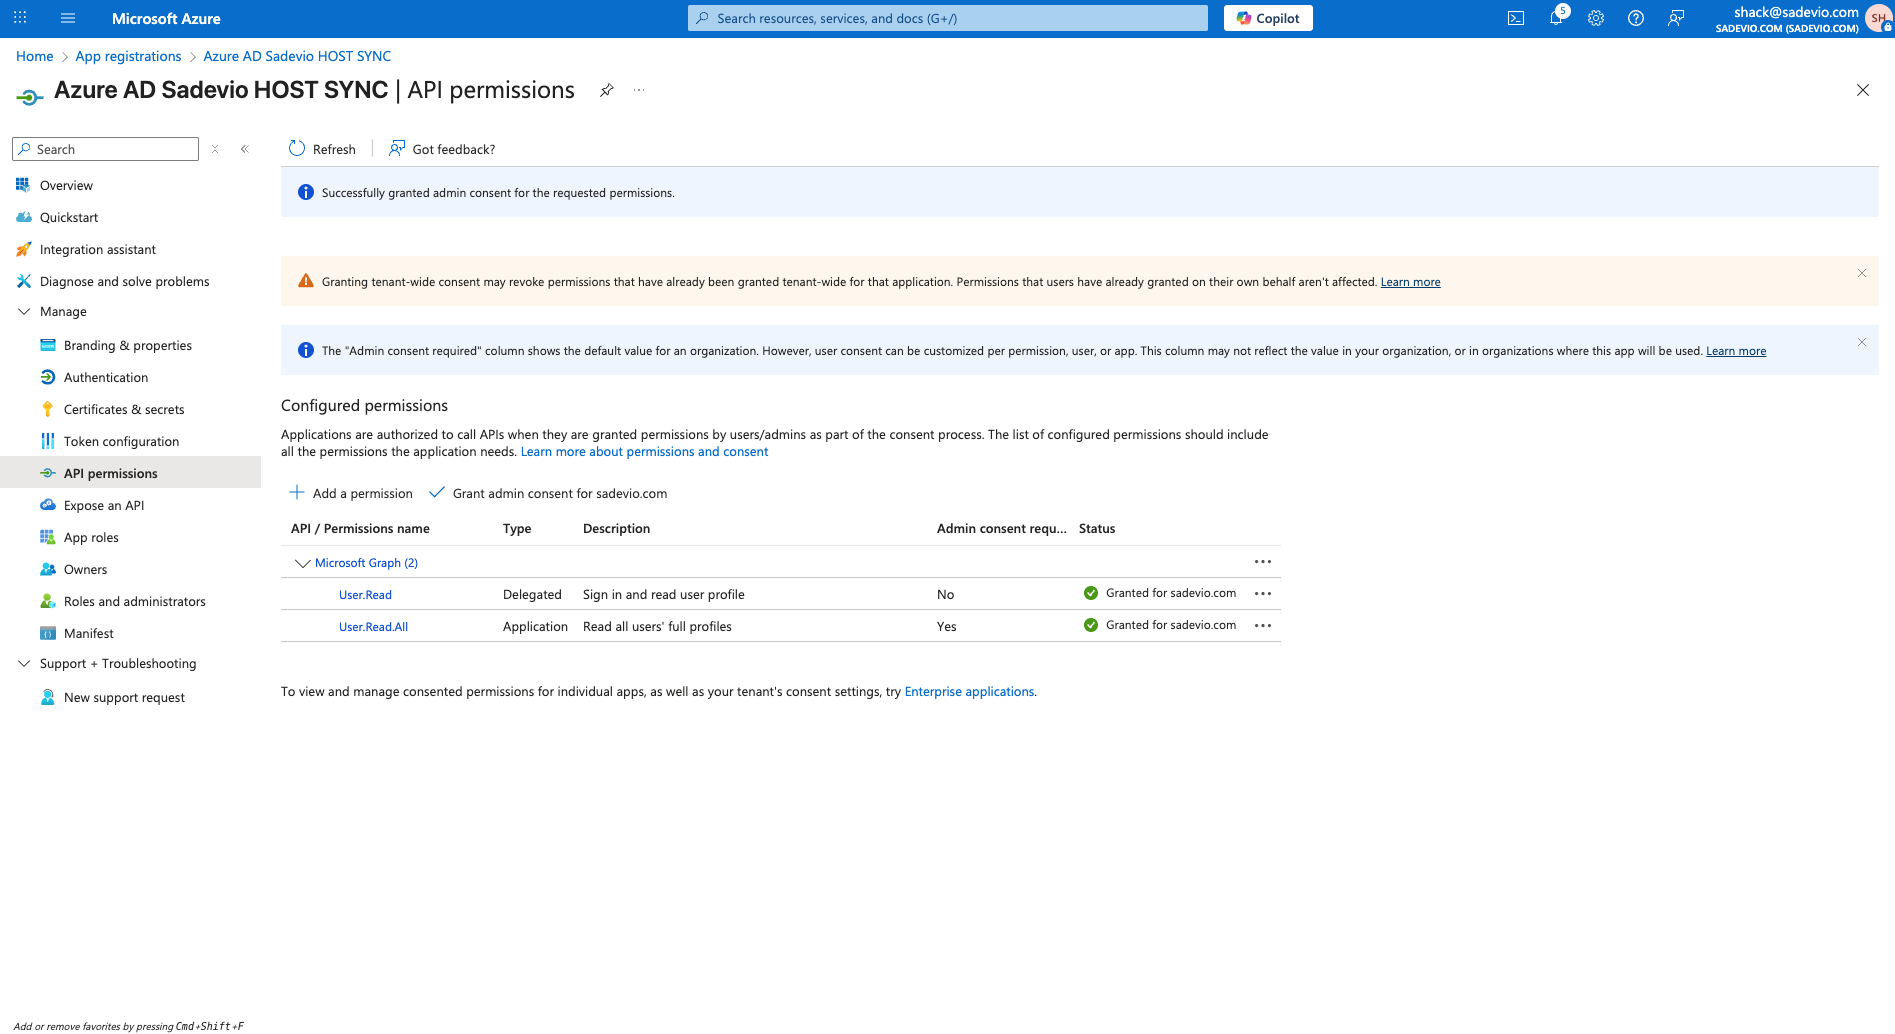
Step 3: Application permissions
- In the new app, go to "Manage" -> "API permissions"
-
Select "Add a permission"
-
Select Microsoft Graph
- Select Application permission
- Add permission User.Read.All
- Select "Add permission"
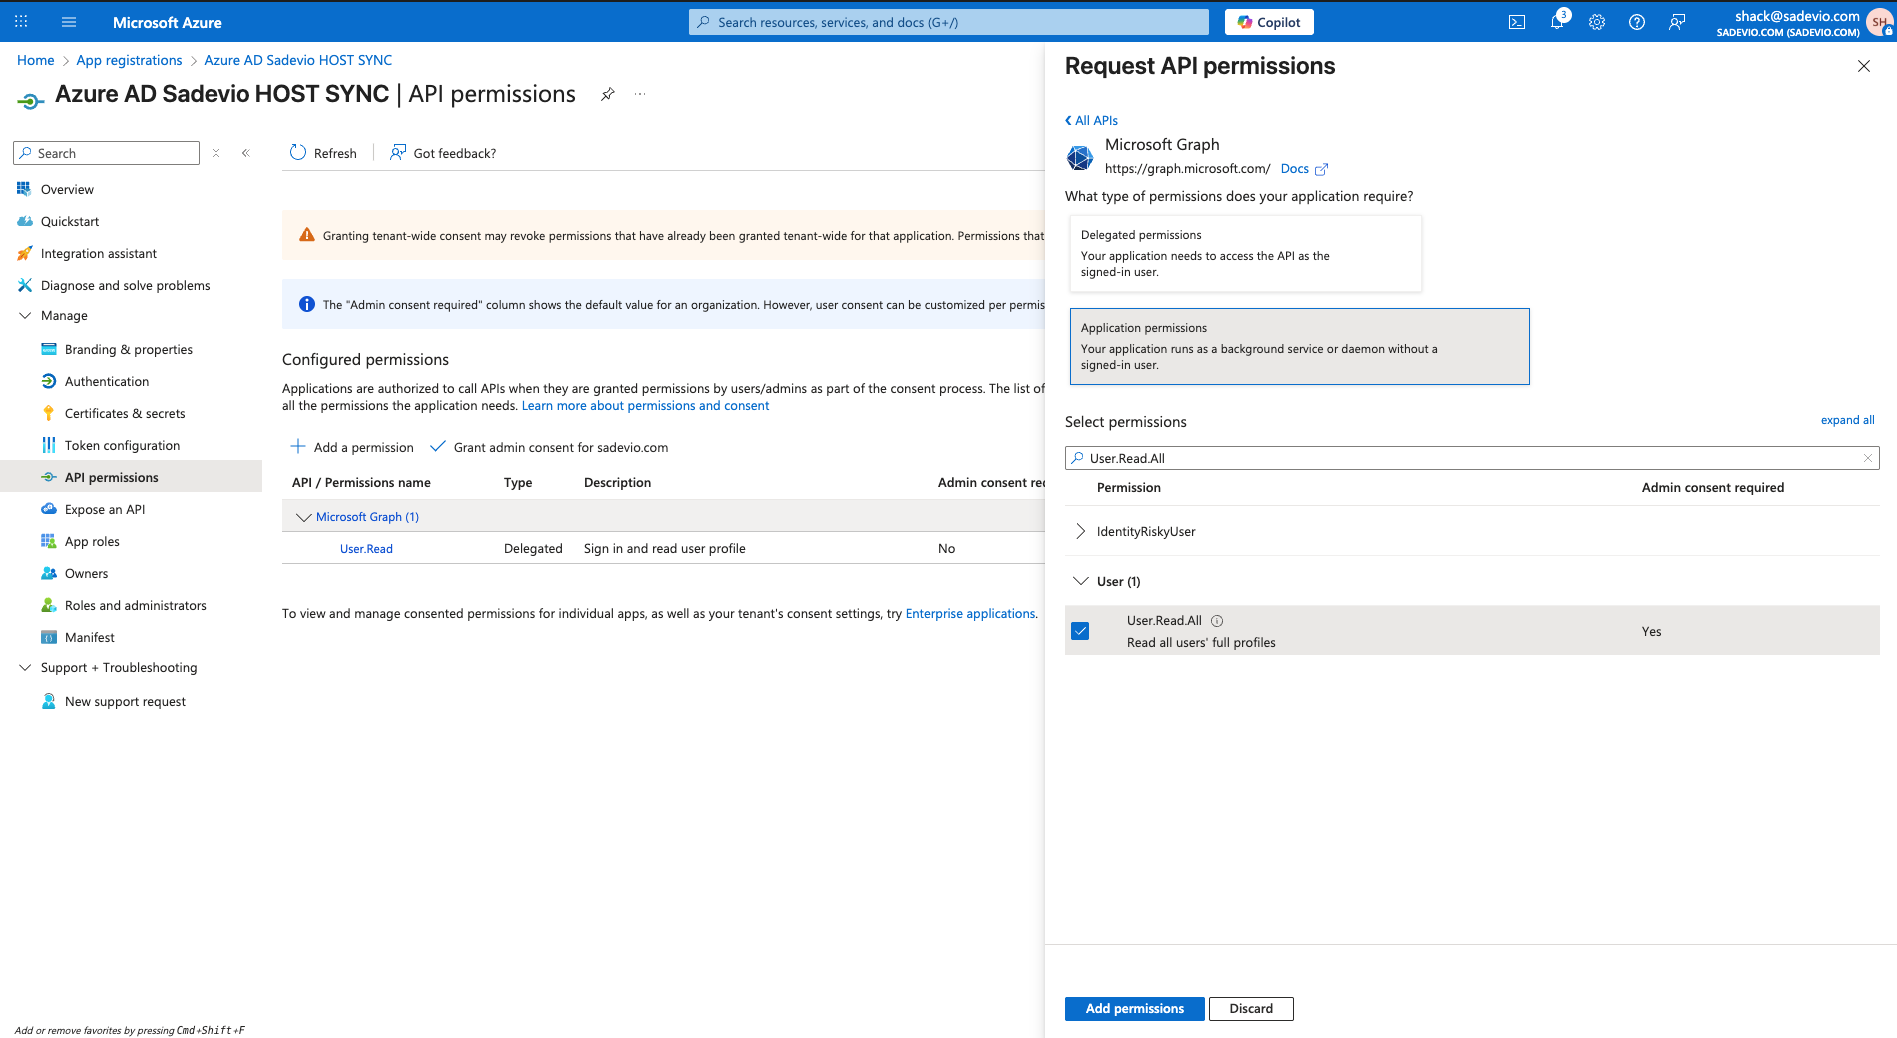
Select now "Grant admin consent for youDomain.com"