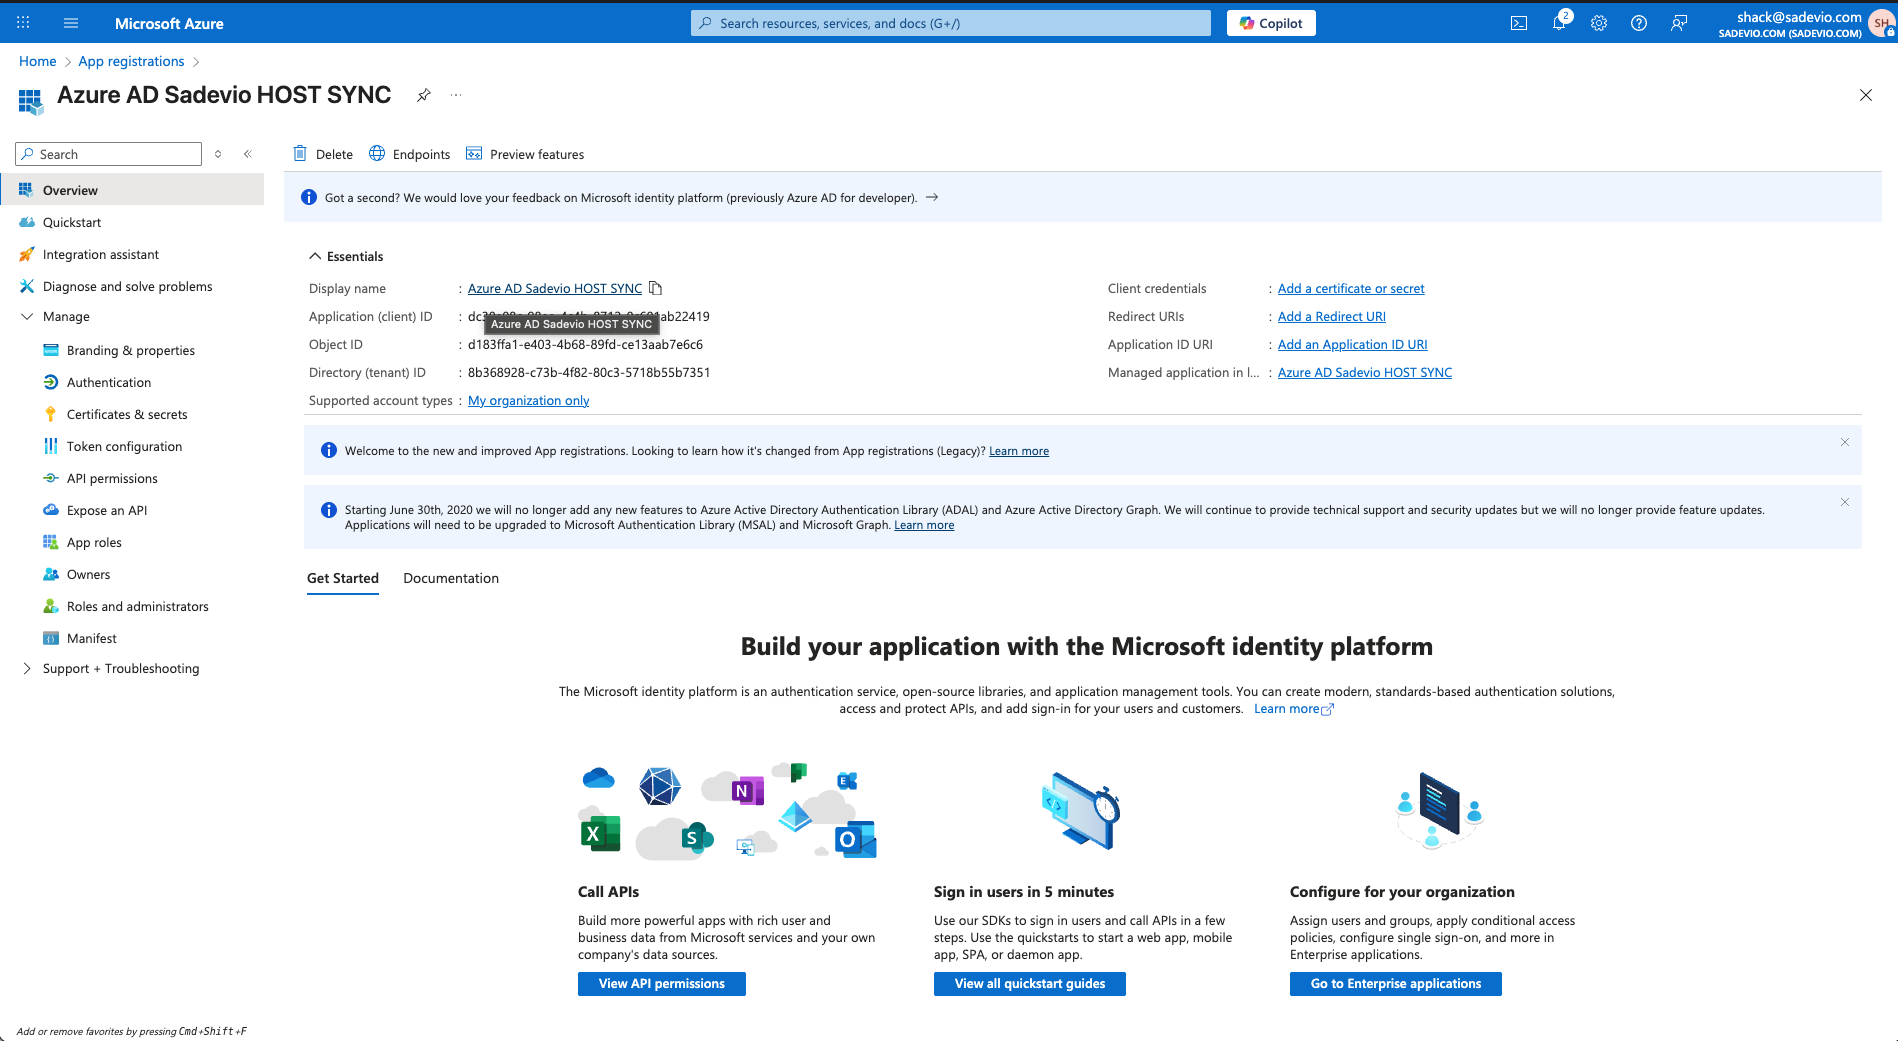
Azure Entra ID (Azure AD) – Employee syncronistaion
Step 1: Create an Enterprise Application
-
In the left menu, click "
Applications"App→"Enterprise applications"registrations" -
Click "+ New
application"registration" -
Select "Create your own application"
-
Enter a name (e.g.
Sadevio)VisitorEmployeeSSOSYNC - Click Register
Choose "Integrate any other application you don't find in the gallery"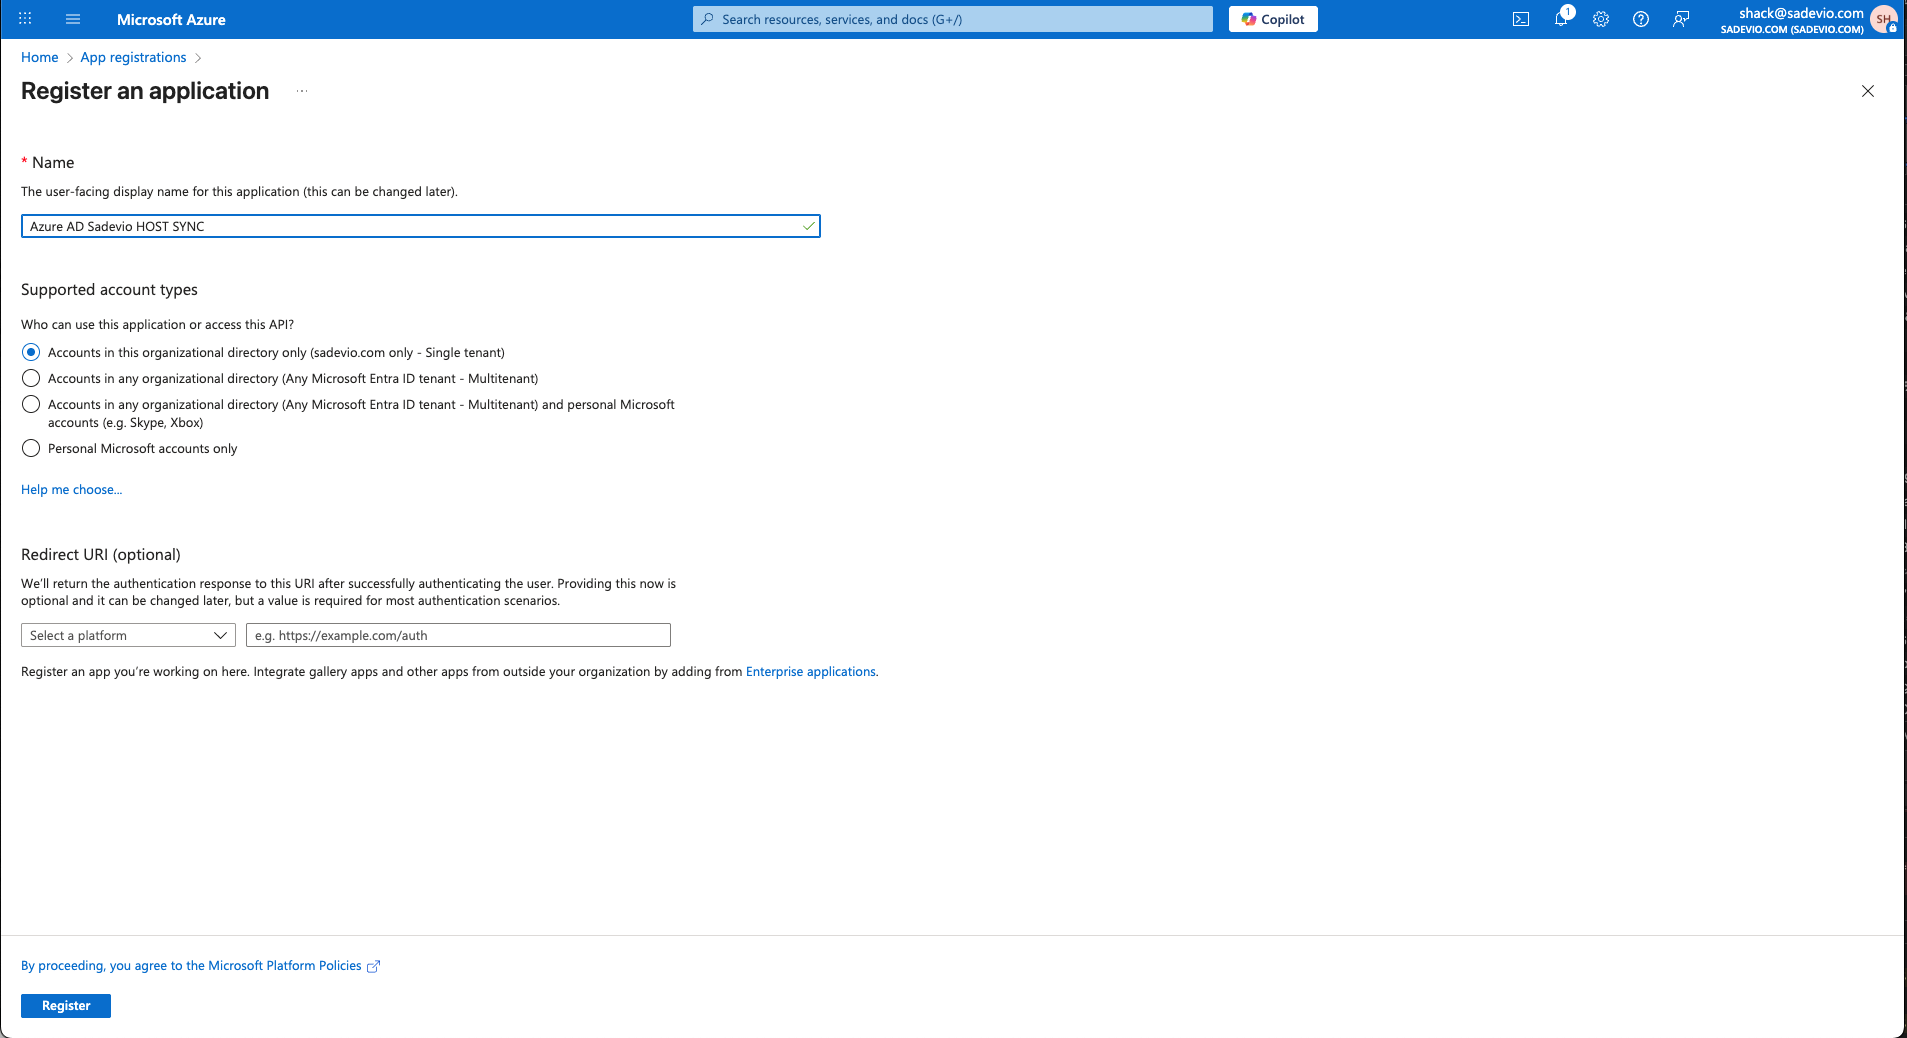
-
ClickCreate
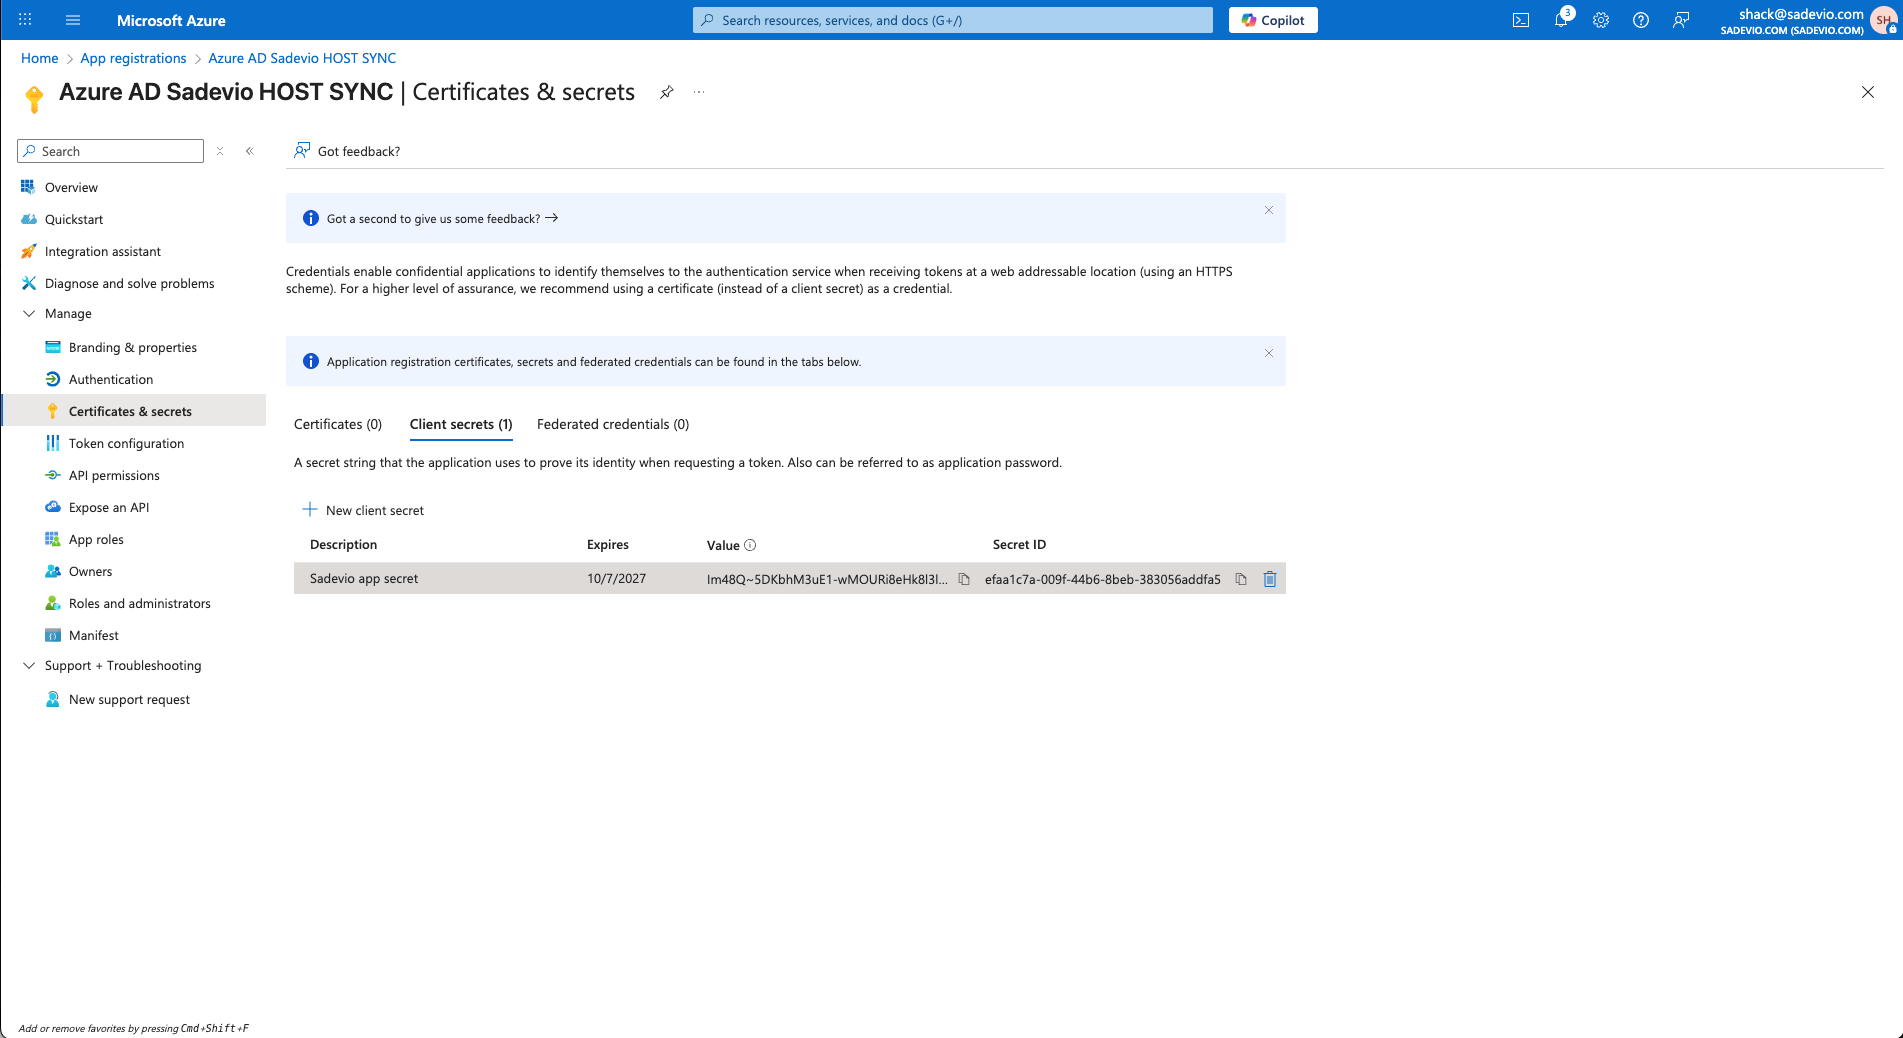
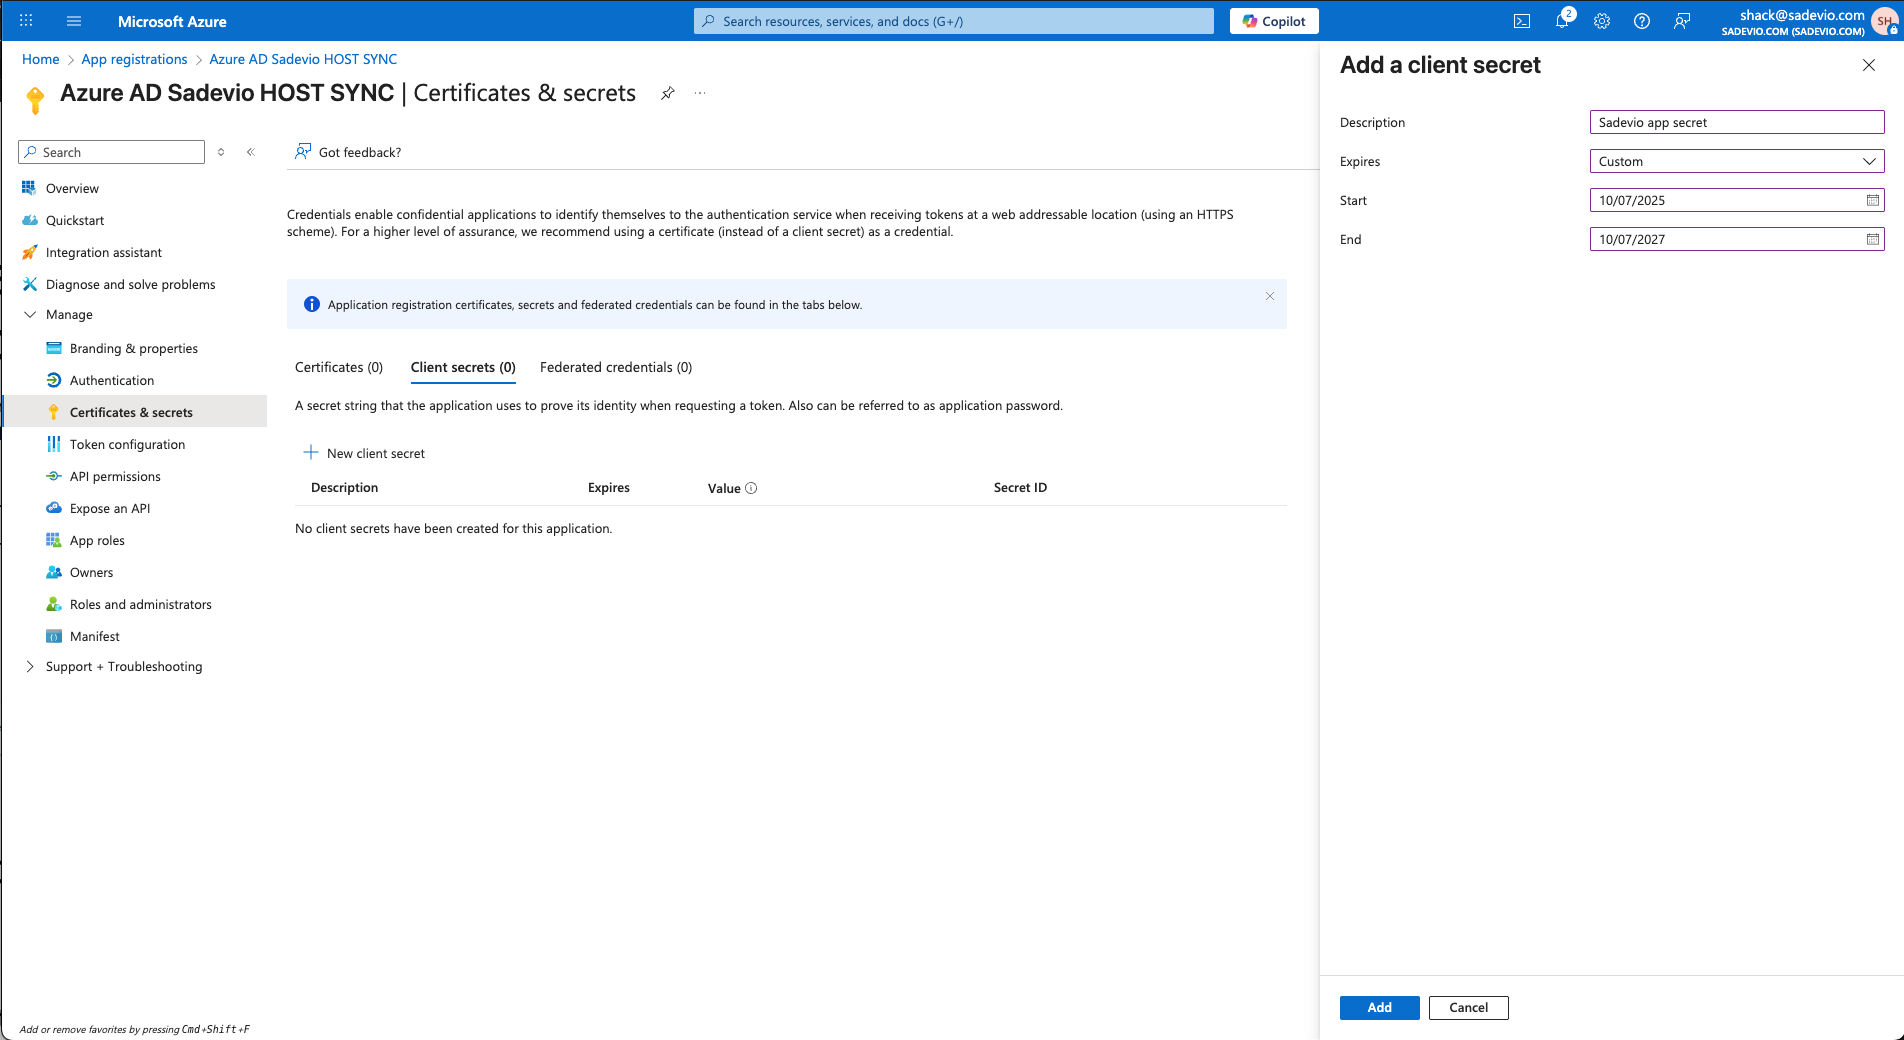
Step 2: ConfigureClient SAML-based Sign-OnSecret
-
In the new app, go to "
SingleManage"sign-on"-> "Certificates & secrets" -
Select
SAMLNewasclientthe sign-on method Fill out theBasic SAML Configurationwith the following values:
| |
| |
| |
|
💡 You can copy and paste these values from the configuration form inside the Sadevio admin panel.
Step 3: Configure User Attributes & Claims
ClickEditunderAttributes & Claimssecret-
EnsureGivetheitfollowing claims are included (default setup should already have them):email→ user’s email addressgivenname→ user’s firsta name which you like and an expiration date.surname→ user’s last namenameoruserprincipalname→ unique identifier (used as NameID)
ℹ️ The NameID claim should ideally be set to the user’s email address (you can adjust this in "Unique User Identifier").
Verification certificates.
On the sadevio platform, you can download the certificate to sign the authentication request. Download the certificate and upload it to entra.microsoft.com
SelectYou "Requirewill verificationneed certificats" and upload the sadevio certificate
Step 4: Download Certificate and SSO URL
UnderSAML Signing Certificate, download the following:Certificate (Base64)– This is theX.509 Certificate
Alsoto copy theLogin"value"URLpart to sadevio.–
ThisStep
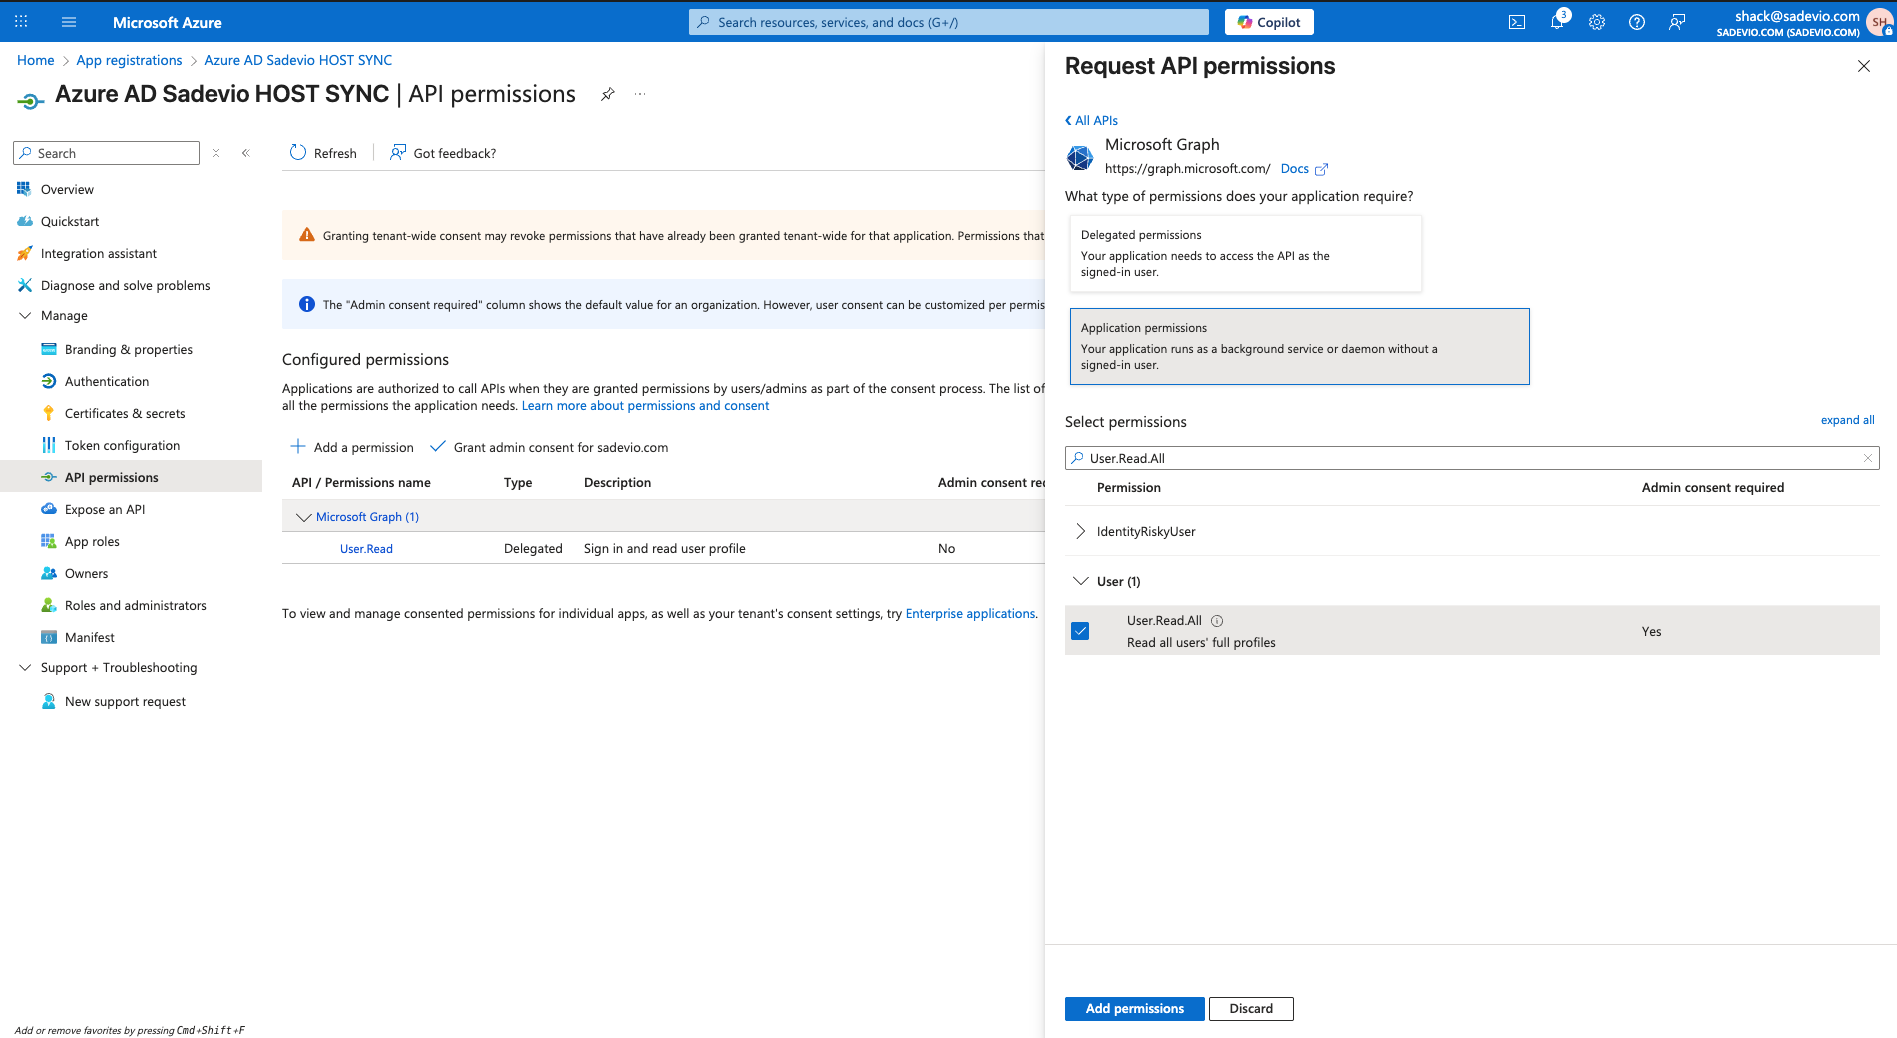
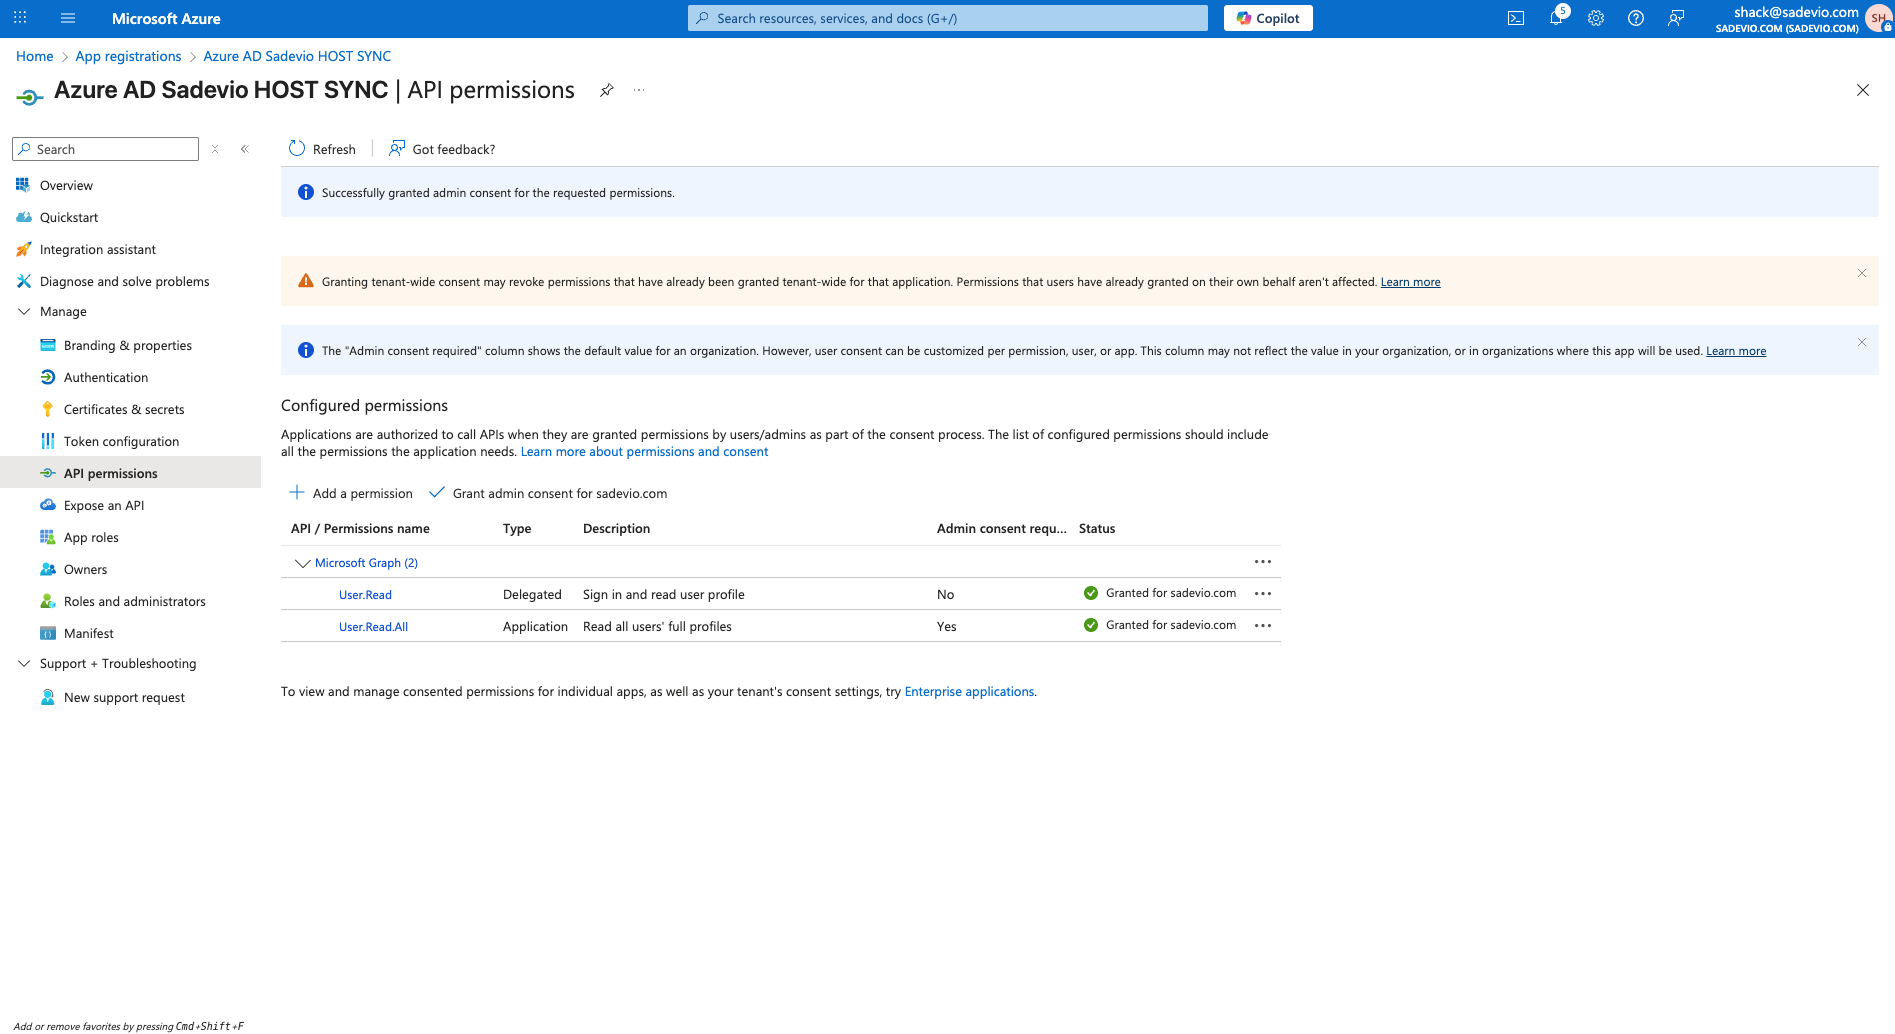
is3: Application permissions- In the new app, go to
Azure"Manage"SSO->URL"API permissions" -
(Optional) Copy theSelectApp Federation Metadata URL– used if you want dynamic configuration
Step 4: Download Certificate and SSO URLUnderSAML Signing Certificate, download the following:Certificate (Base64)– This is theX.509 Certificate
Also copy theLogin URL– This is theAzure SSO URL(Optional) Copy theApp Federation Metadata URL– used if you want dynamic configuration
Step 6: Assign UsersIn Azure, go to theUsers and groupssection of the Enterprise AppClick+"Adduser/groupa permission"-
Select
theMicrosoftusers or groups who should be able to sign in using SSOGraph - Select Application permission
- Add permission User.Read.All
- Select "Add permission"
Click
Select now
Assign"Grant admin consent for youDomain.com"- In the new app, go to